
According to HubSpot, YouTube is one of the largest video sharing platforms today, thanks to its explosive growth since it was first founded in 2005. More than 400 hours of video are uploaded to YouTube every minute and over one billion hours of video are watched every day.
Majority of the videos that you watch online are on hosted on YouTube. It doesn’t matter whether it’s a movie trailer, a DIY guide, or a music video. Chances are it must have been either on YouTube directly or through video embeds on third-party websites.
Nowadays, vlogging and video content creation have become very easy for common users. If you have a knack for any of these, you can do something different instead of going down the usual path. Yes, as the title suggests, you can build your own site like Youtube in a few steps.
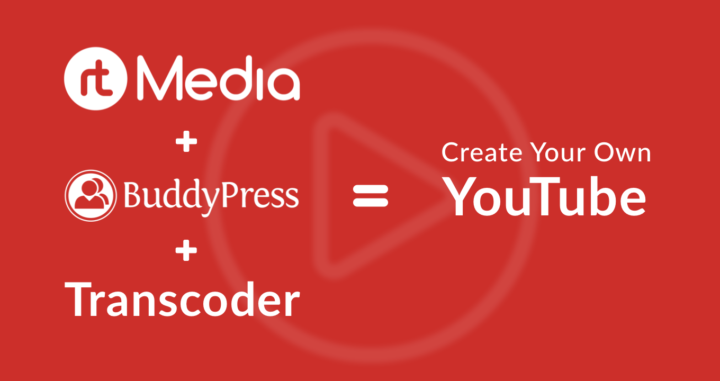
In this edition of our How-to guide, we will take you through the steps required to create a website like YouTube or Vimeo using rtMedia, BuddyPress and WordPress.
Required WordPress plugins
BuddyPress
To add social networking features. YouTube is primarily a video sharing community whose members have their own profiles, can message each other, follow other’s activity, and get instant notifications. To get these features on WordPress, you need BuddyPress. BuddyPress adds these basic social networking features to your WordPress site.
rtMedia
To allow people to upload, play and manage videos on your website. rtMedia enables support for uploading and playing video files on your BuddyPress site. Other than that, you can also organize the uploaded videos into separate private/public albums. If this isn’t enough, you can also moderate and restrict the content uploaded to your site.
Transcoder for WordPress
To transcode video files uploaded in other formats to web-compatible MP4 format. To make all the videos uploaded to your community site compatible with modern web browsers, you need to encode it using the web standard of the MP4 format. You can do that using the Transcoder for WordPress plugin.
NOTE: We won’t be recommending any WordPress theme since it depends on your niche. But if you still insist, we recommend the following high-quality WordPress themes –
We have also got our own premium themes which you can repurpose to suit your needs.
Create a website like YouTube using WordPress 🔧
Time needed: 30 minutes
Let’s jump into the guide now.
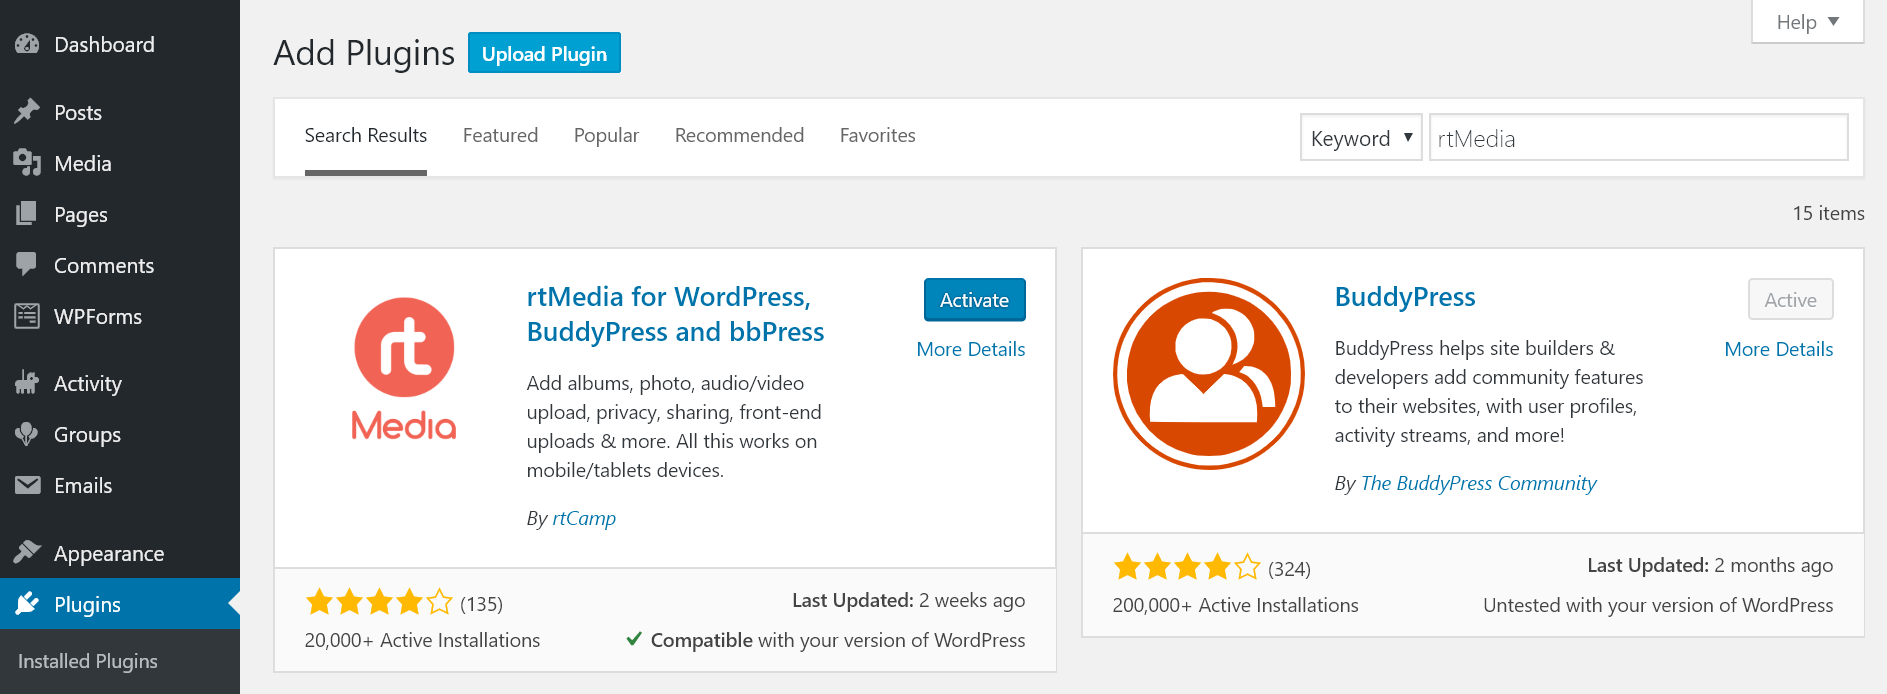
- Install and activate BuddyPress
Install and activate the BuddyPress plugin from your WordPress dashboard. You can follow our BuddyPress installation guide.

- Install and activate rtMedia
Install and activate the rtMedia plugin from your WordPress dashboard.
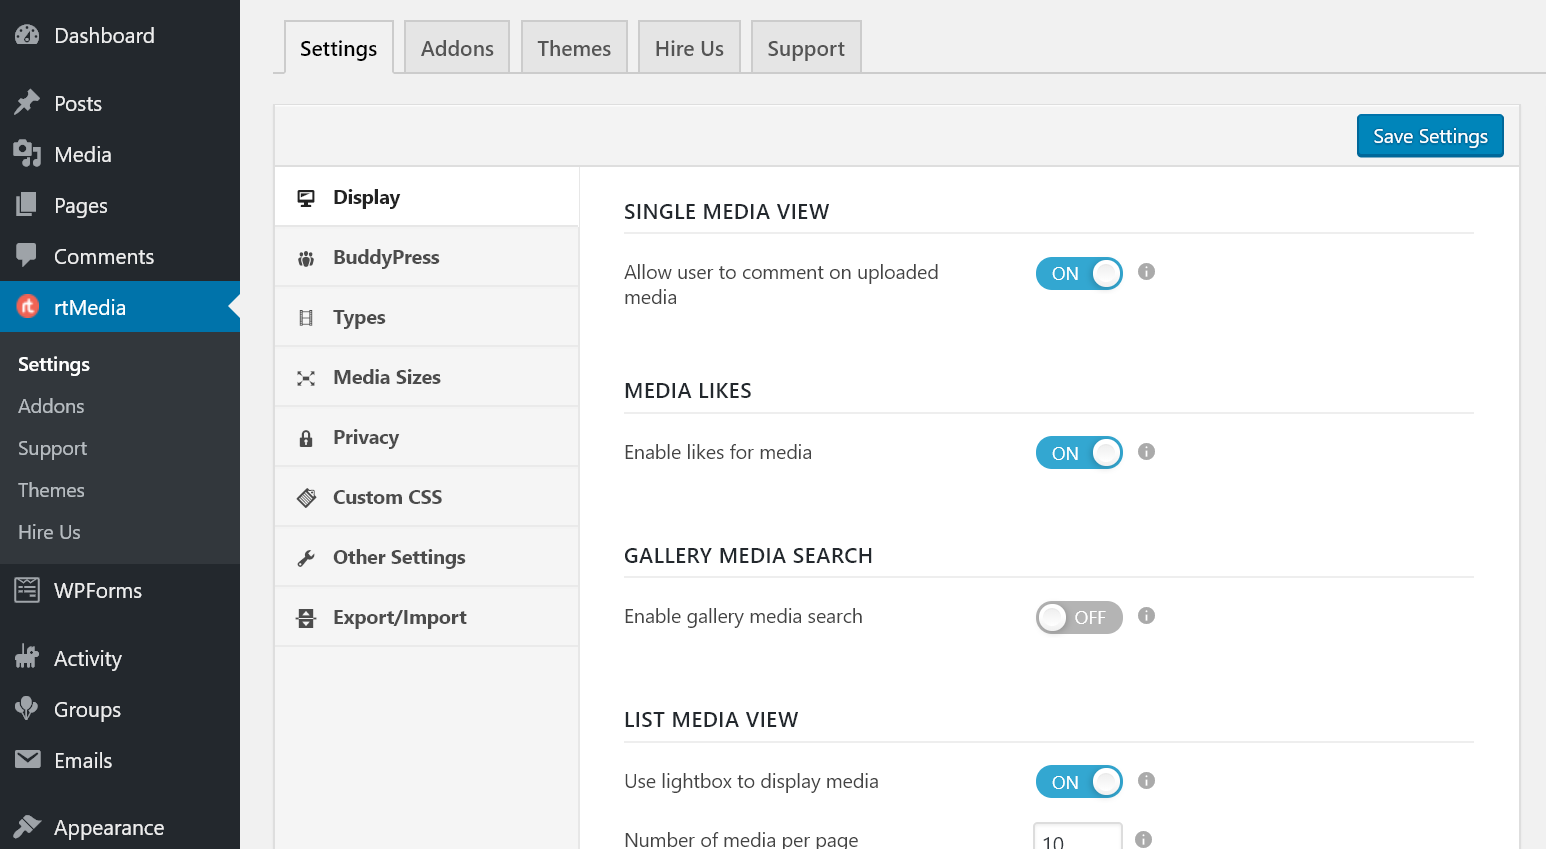
- Display settings
Go to the rtMedia settings page and under the Display menu, turn on the toggle under Single Media View and Direct Upload. Don’t forget to save your changes before moving on to each subsequent section.
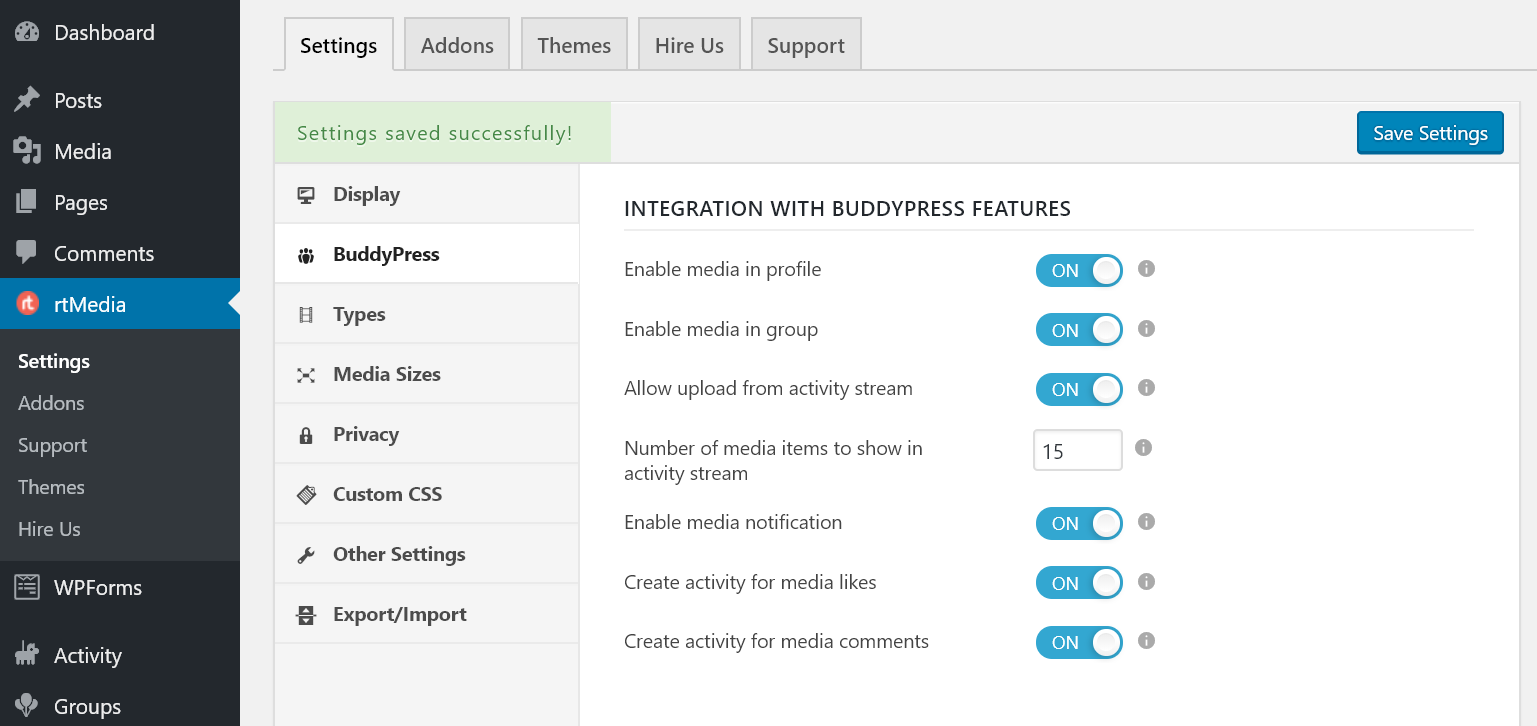
- BuddyPress settings
Navigate to the BuddyPress sub-menu and turn on all the toggles under ‘Integration With BuddyPress Features’.
- BuddyPress Album settings
Scroll down, turn off comment media and enable all album settings.

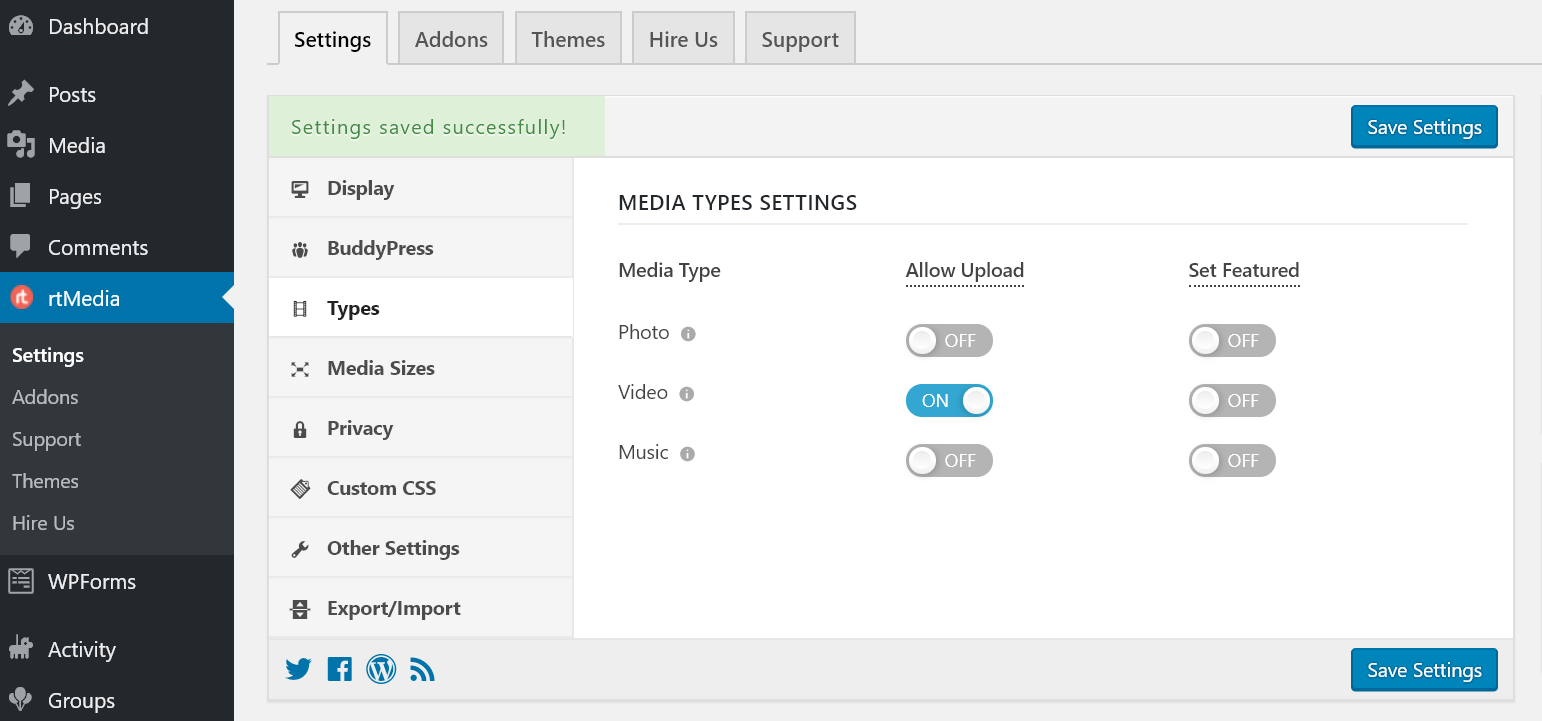
- Media Types settings
Move to the Types section and disable support for photos and music files.
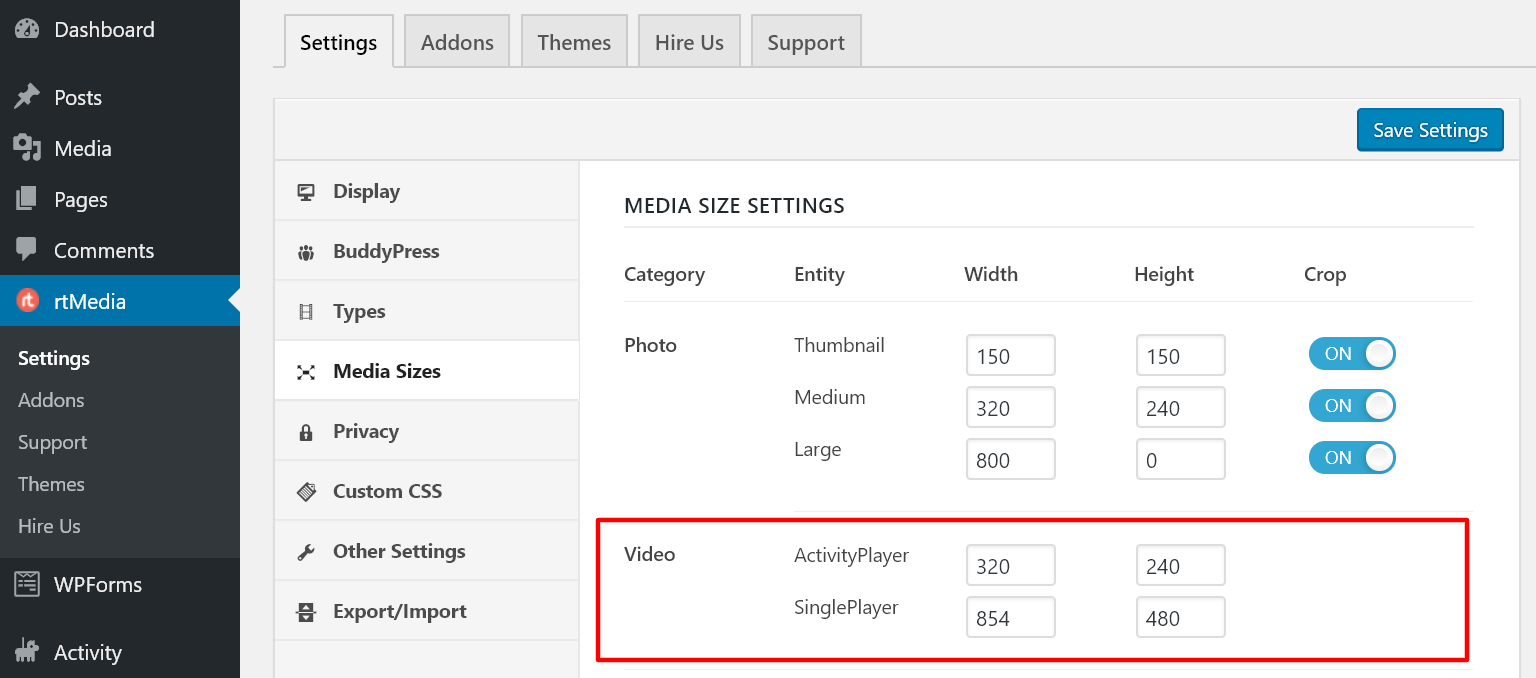
- Media Sizes settings
Go to the Media Sizes section to change the dimensions (height and width) of the video player. ActivityPlayer refers to the videos played in the news feed (like videos played on Facebook news feed) and SinglePlayer refers to the videos played on its own dedicated page (like YouTube). You can ignore the rest.
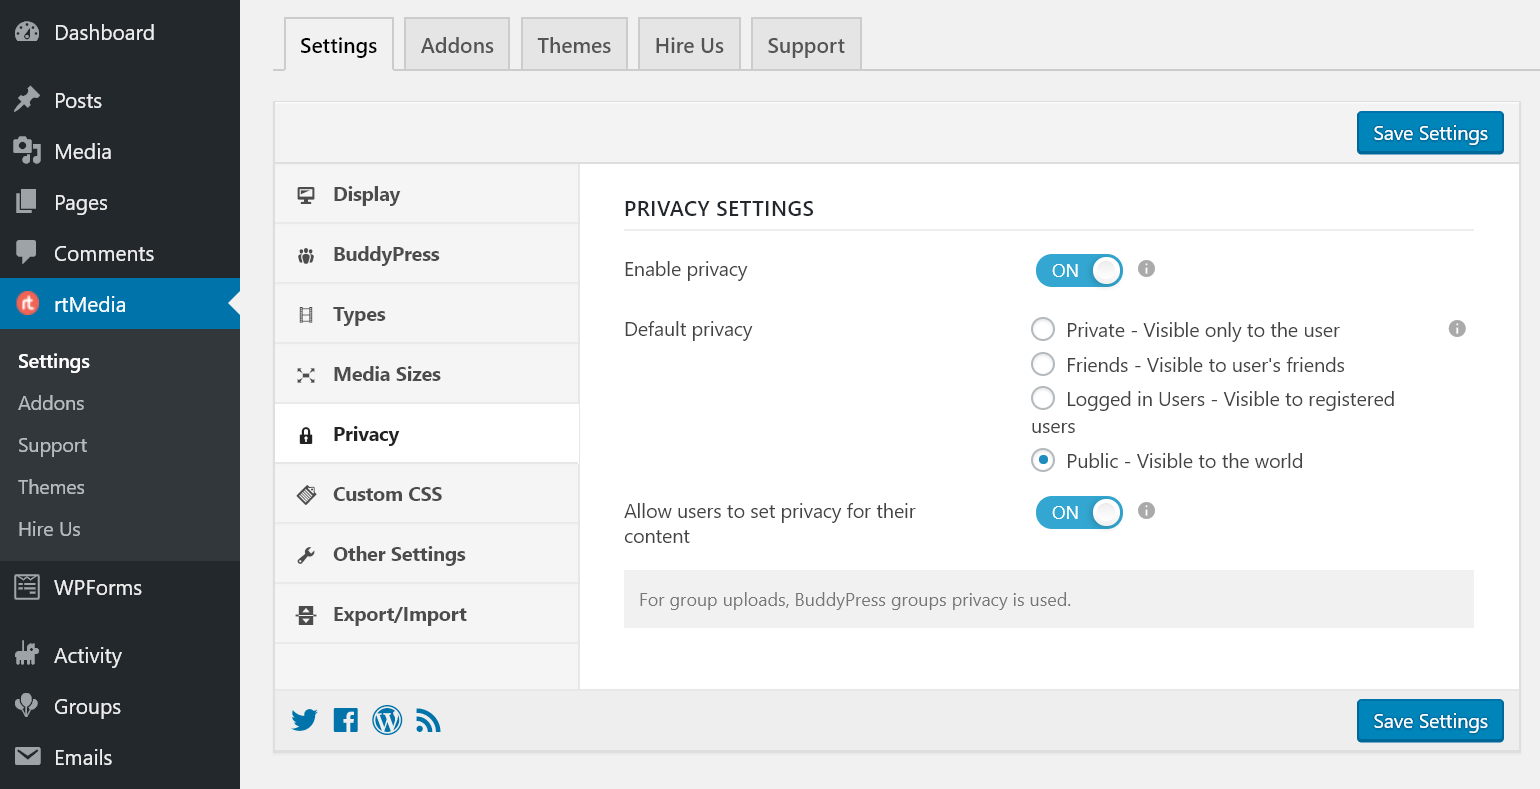
- Privacy settings
Go to the Privacy section to enable privacy settings for all users and allow them to pick their own privacy settings for their uploaded videos.
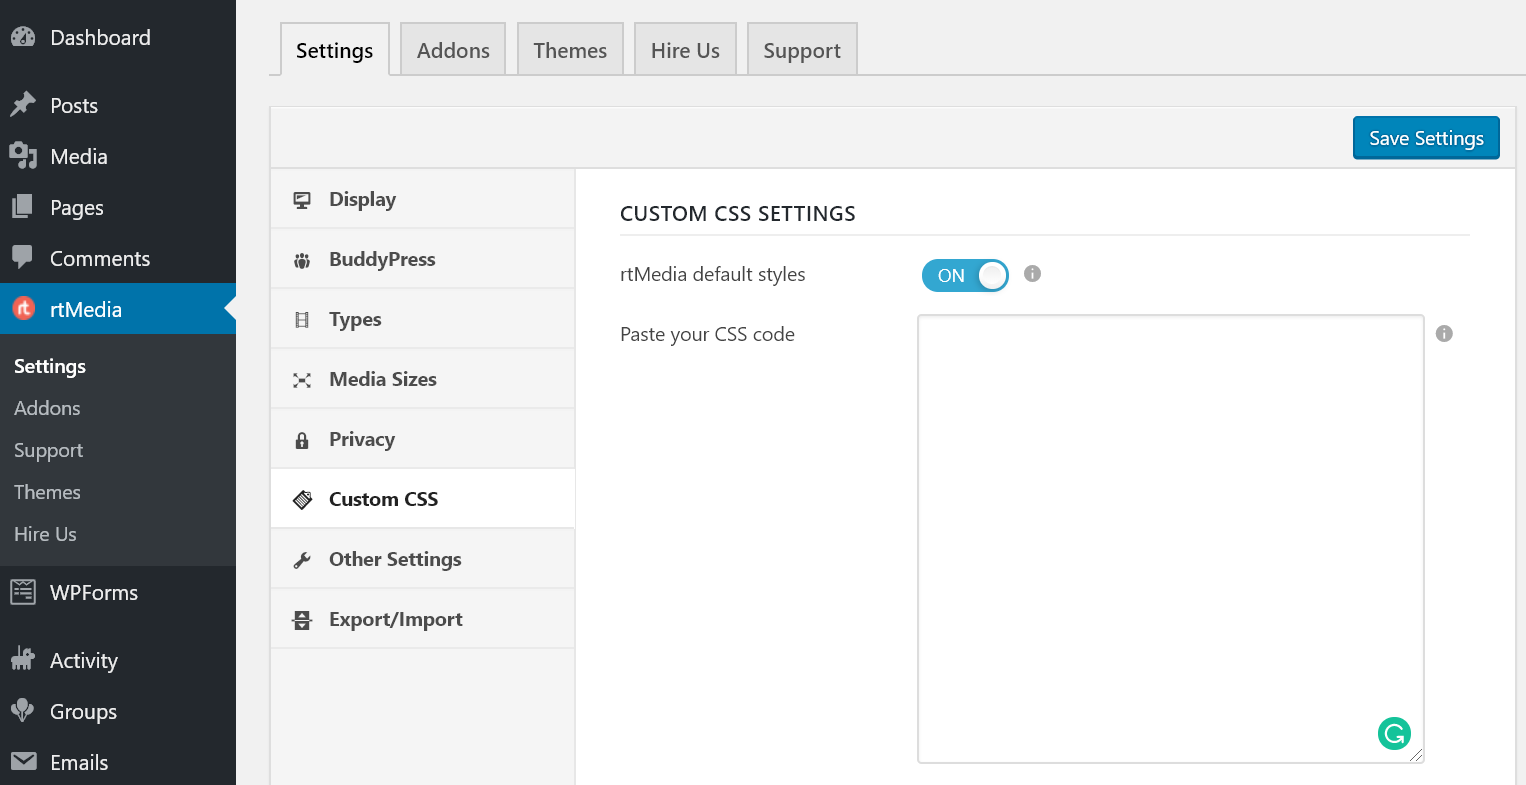
- Custom CSS settings
If you are not satisfied with the default styles provided by rtMedia, you can always disable it and use your own styles. Just navigate to the Custom CSS section under rtMedia settings and paste your CSS code.
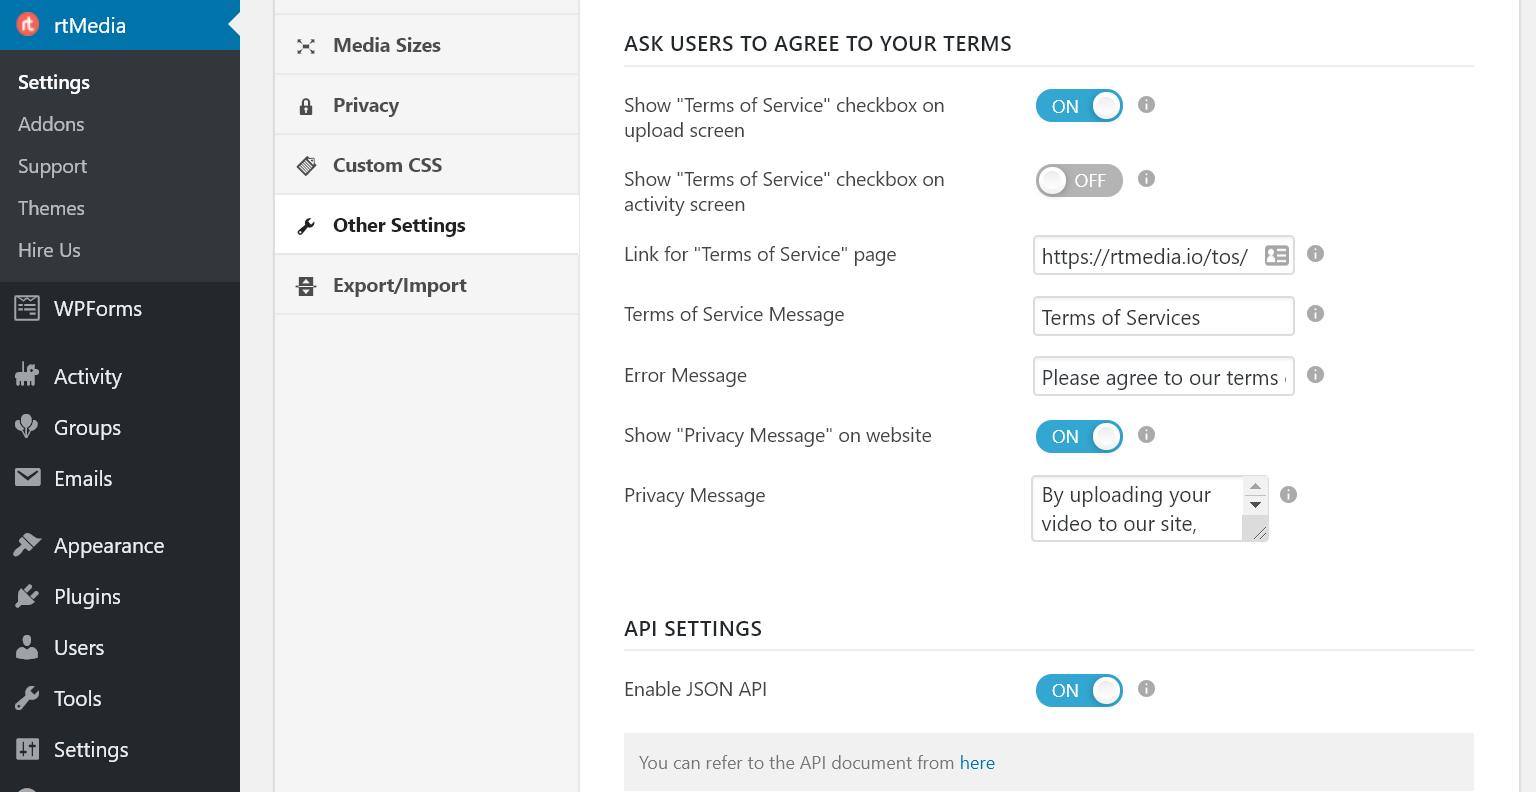
- Other settings
Go to the Other Settings section to configure admin bar integration, make users agree to your terms of service and privacy policy before uploading videos, and enable JSON API.
- Buy rtMedia Pro Bundle
Now, you have enabled all the basic features required to make a website like YouTube with WordPress. But then, these features are not enough to make it a full-fledged video sharing platform. For that, you need some of our premium rtMedia add-ons.
rtMedia Premium Benefits
Here’s a list of premium rtMedia add-ons that you will be needing to enable YouTube-like features –
rtMedia View Counter
rtMedia Favorites
rtMedia Likes
rtMedia Custom Attributes
rtMedia Album Privacy
rtMedia Sorting
rtMedia Sidebar Widgets
rtMedia Default Albums
rtMedia Moderation
rtMedia Social Sharing
rtMedia Restrictions
rtMedia Membership (optional)
rtMedia Set Custom Thumbnail for Audio/Video
Buying each of these add-ons separately would cost you around $837 but if you purchase the rtMedia Premium Bundle, you can get access to all our 35 premium add-ons for just $499. Get the rtMedia Pro Bundle.
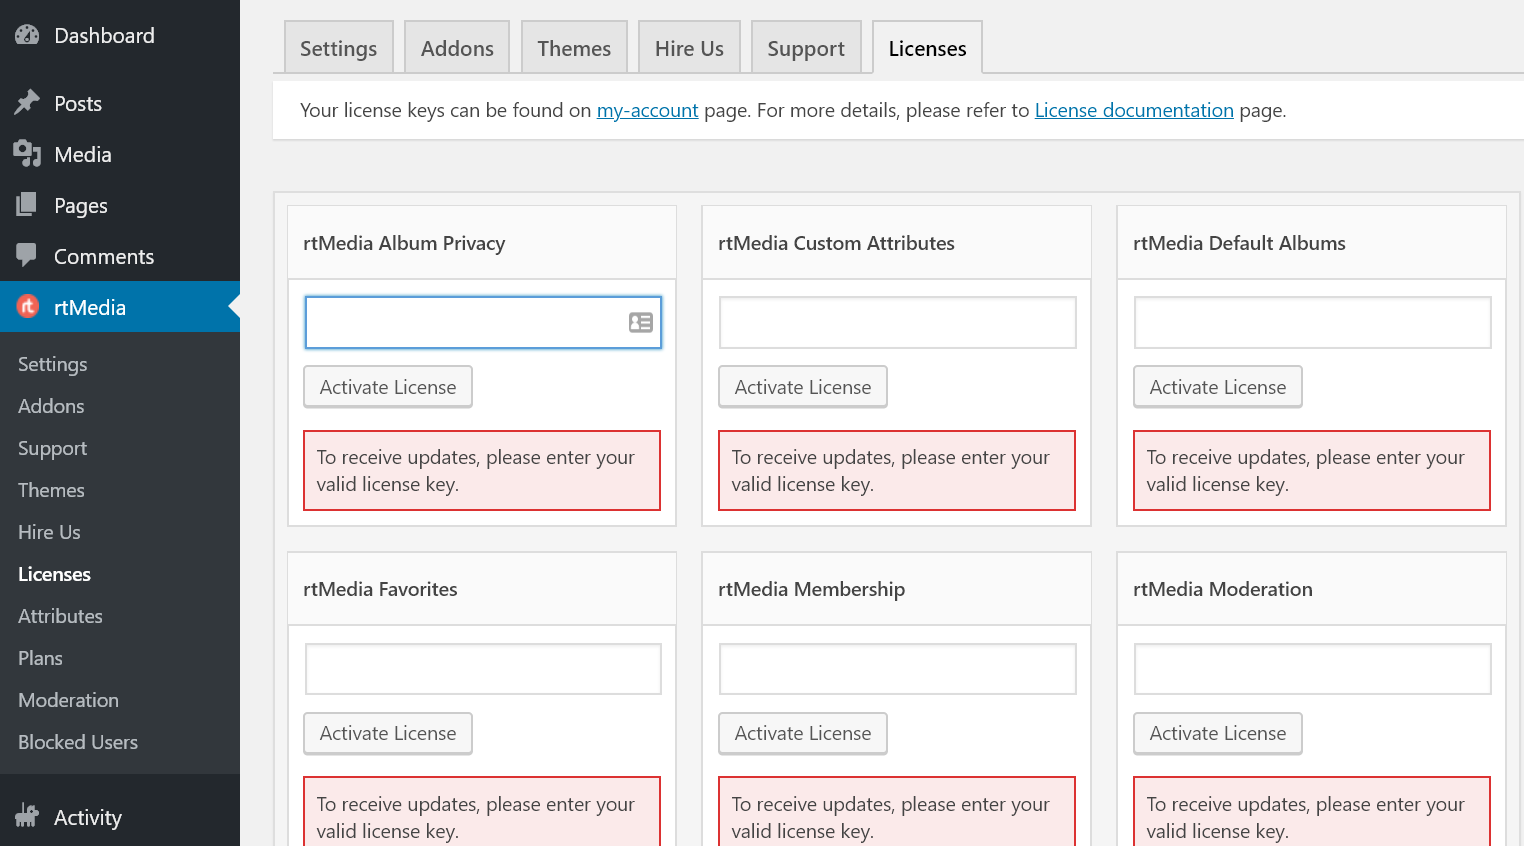
- Download rtMedia add-ons
Once you have purchased the rtMedia Pro bundle, login to your rtMedia account and download the rtMedia premium add-ons mentioned in the above list.
- Install and activate rtMedia add-ons
Go back to your site, install all the downloaded add-ons one by one, and activate them with your license keys.
- Open rtMedia Settings page
Once you have activated all the required add-ons, go back to the rtMedia settings page. You will now be greeted with additional options to configure these extra features.
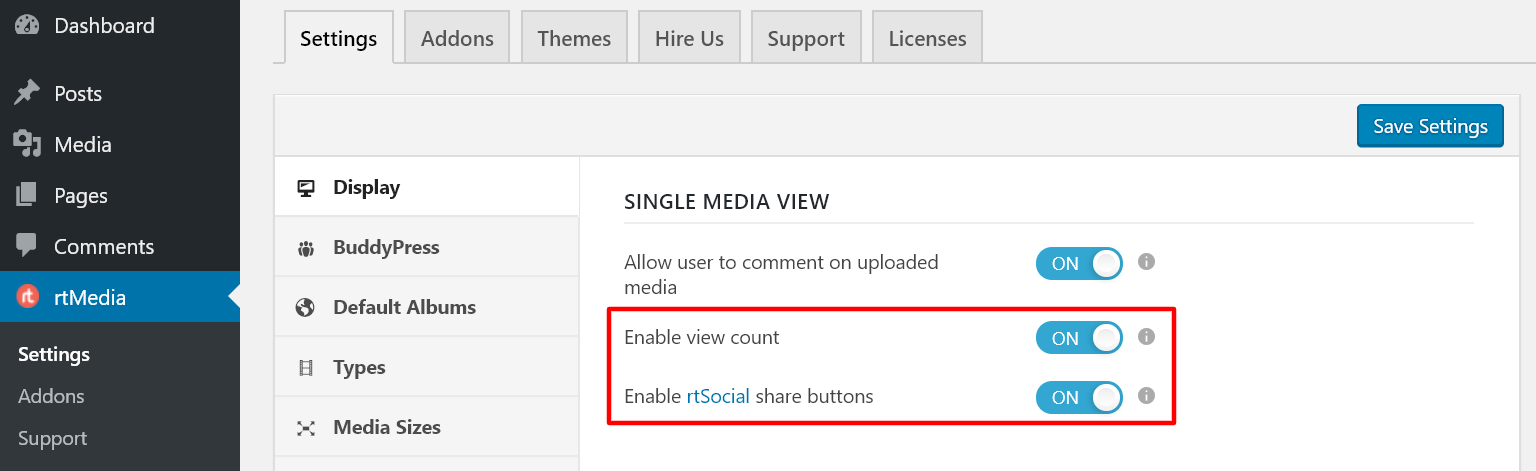
- Enable view counter and social share buttons
We go through them one by one. First, go to the Display section and enable view counter and rtSocial share buttons.
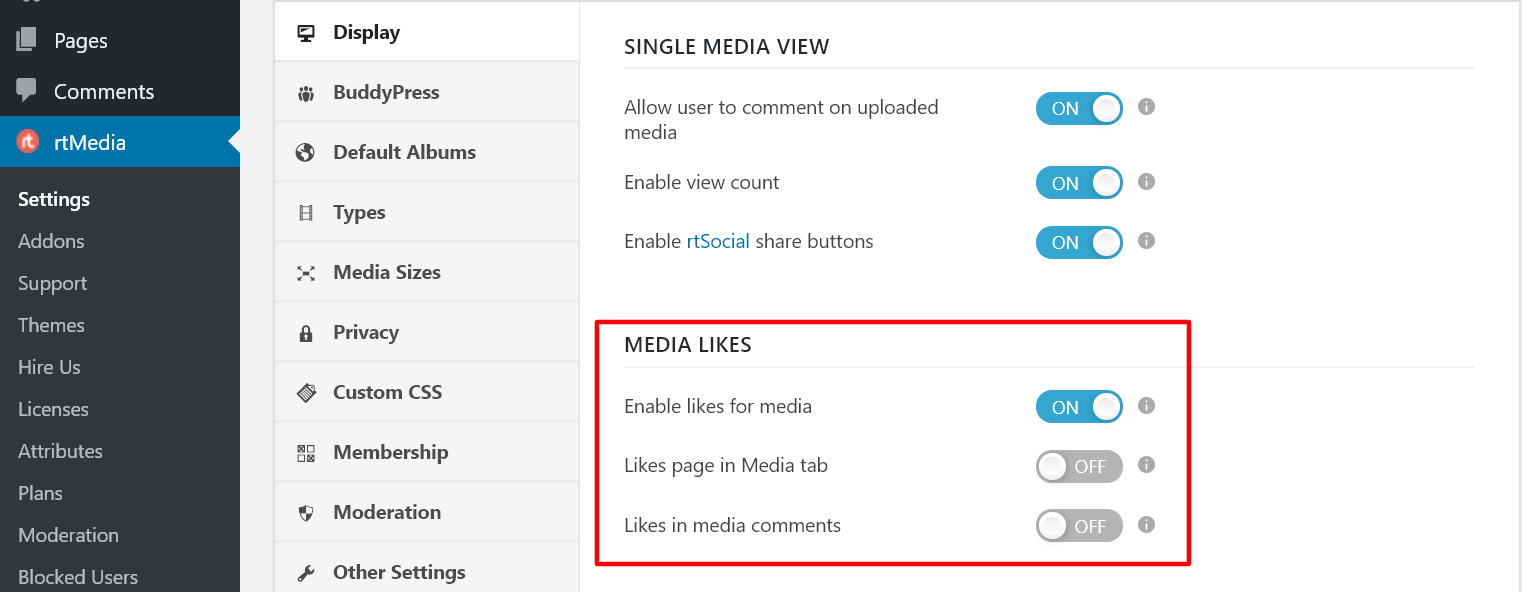
- Enable media likes
Then, scroll down to find the Media Likes heading under which you can find options to enable the ‘like’ feature for all videos.
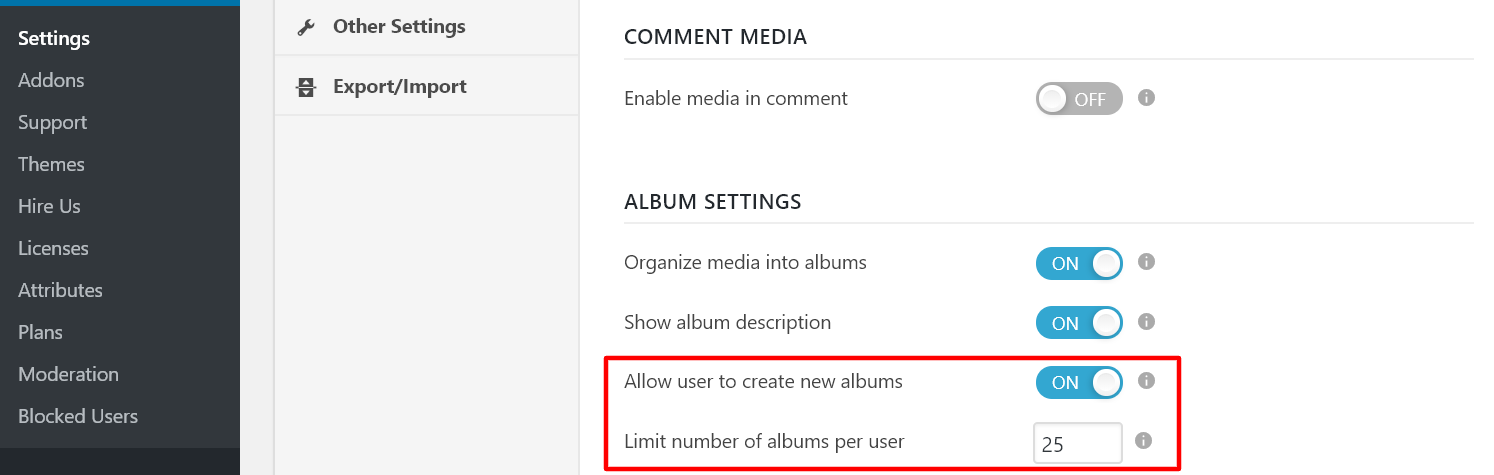
- Allow users to create albums
Move on to the BuddyPress section, scroll down till you find Album Settings, and allow users to create new albums. You can always limit the number of albums users can create.
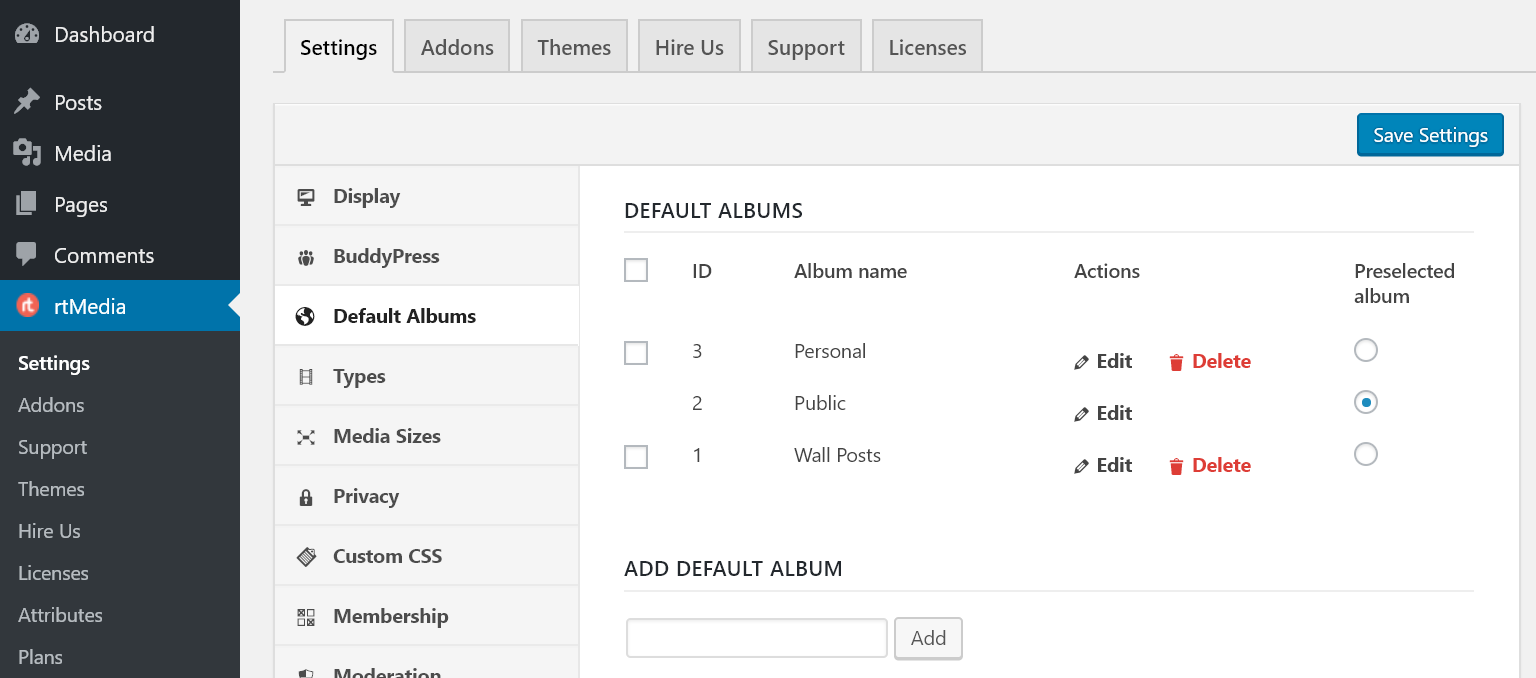
- Create default albums
Go down to the Default Albums section to create the default albums for your site.
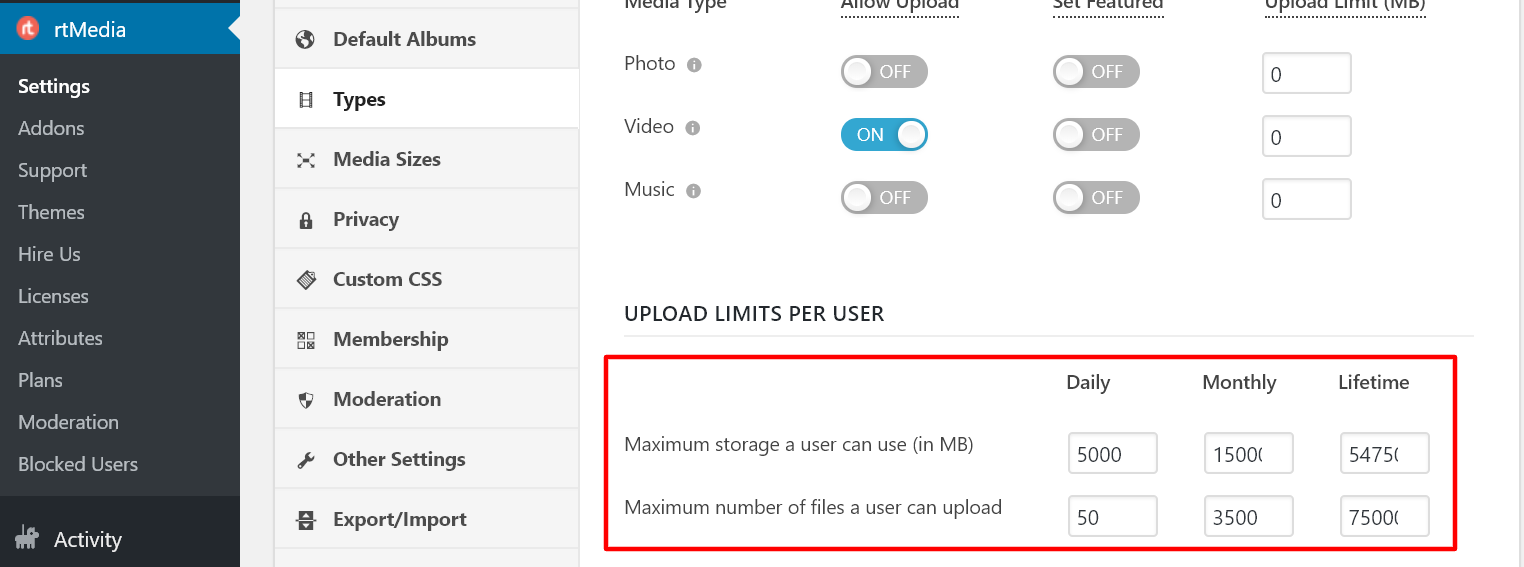
- Limit media uploads
To limit the amount and number of videos users can upload to your site, open up the Types section, scroll down to ‘Upload Limits Per User’ and change the values.
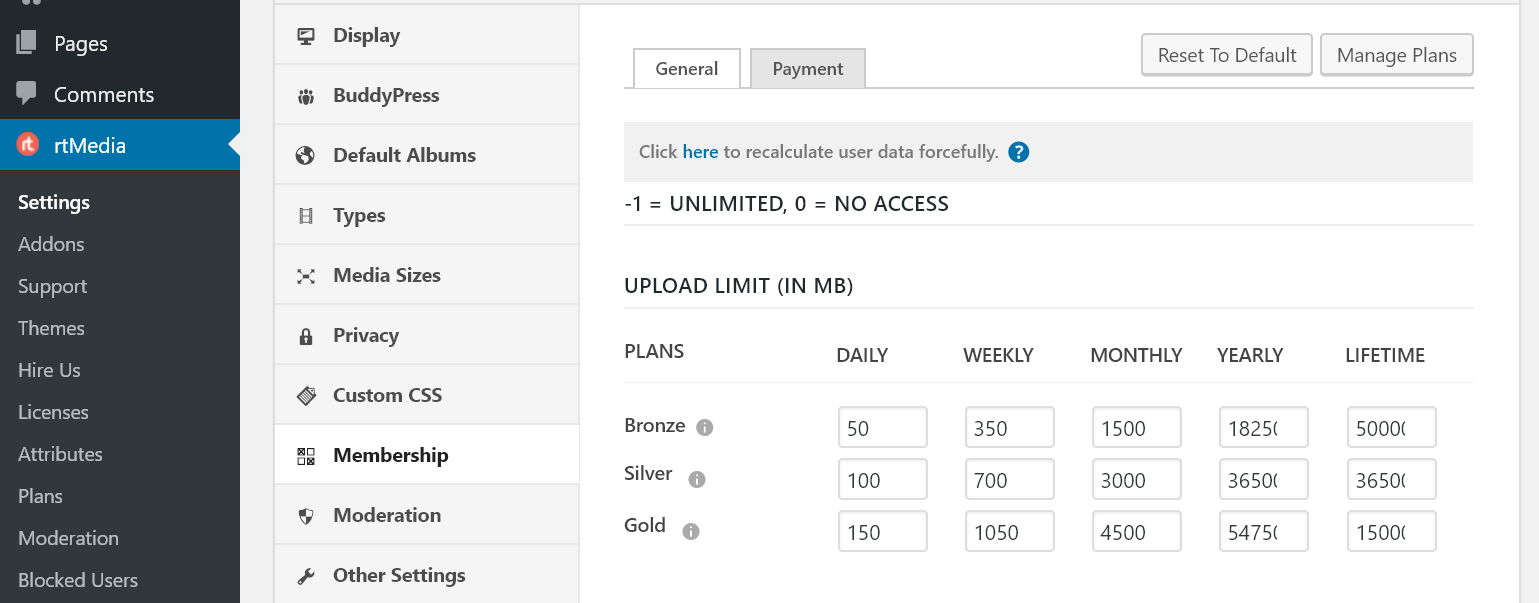
- Create membership plans (optional)
If you are looking to charge a membership fee from your members for uploading videos on your site, you can add plans and configure payment methods by navigating to the Membership section.
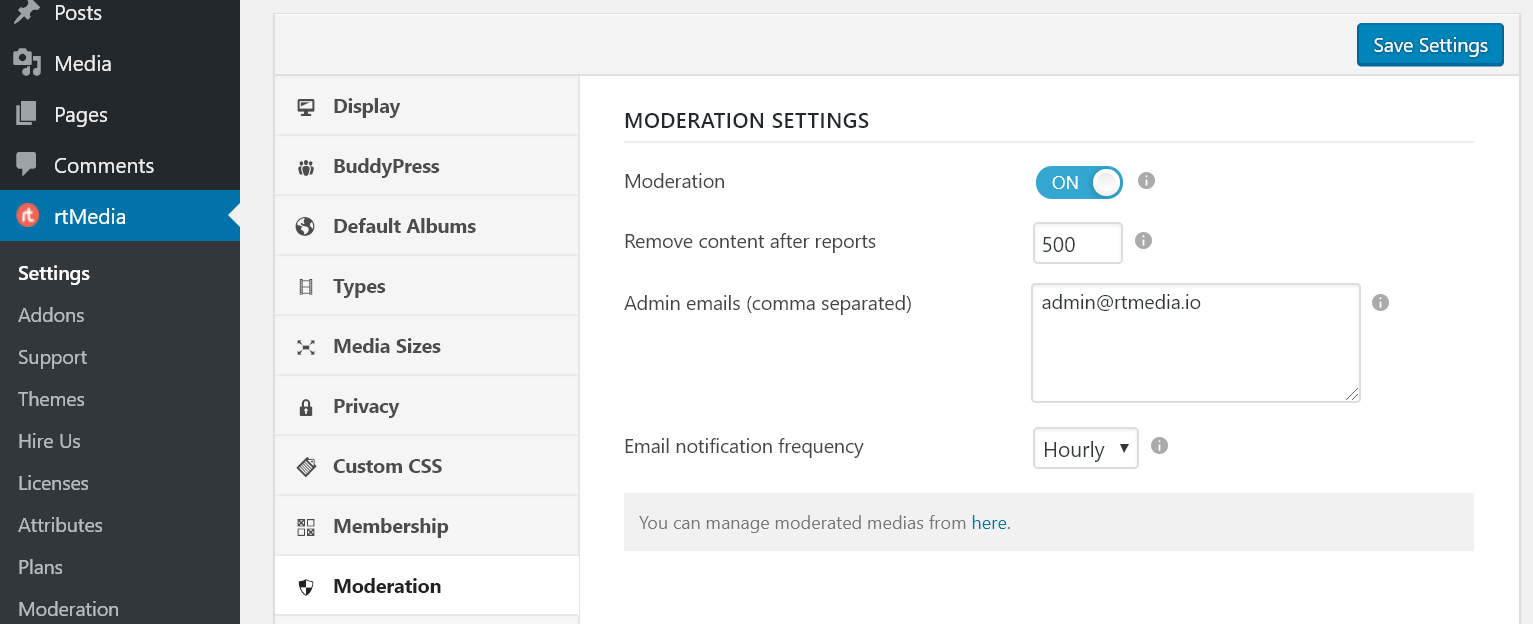
- Enable media moderation
To take down videos which go against the terms of service on your site, go to the Moderation section and configure the moderation settings.
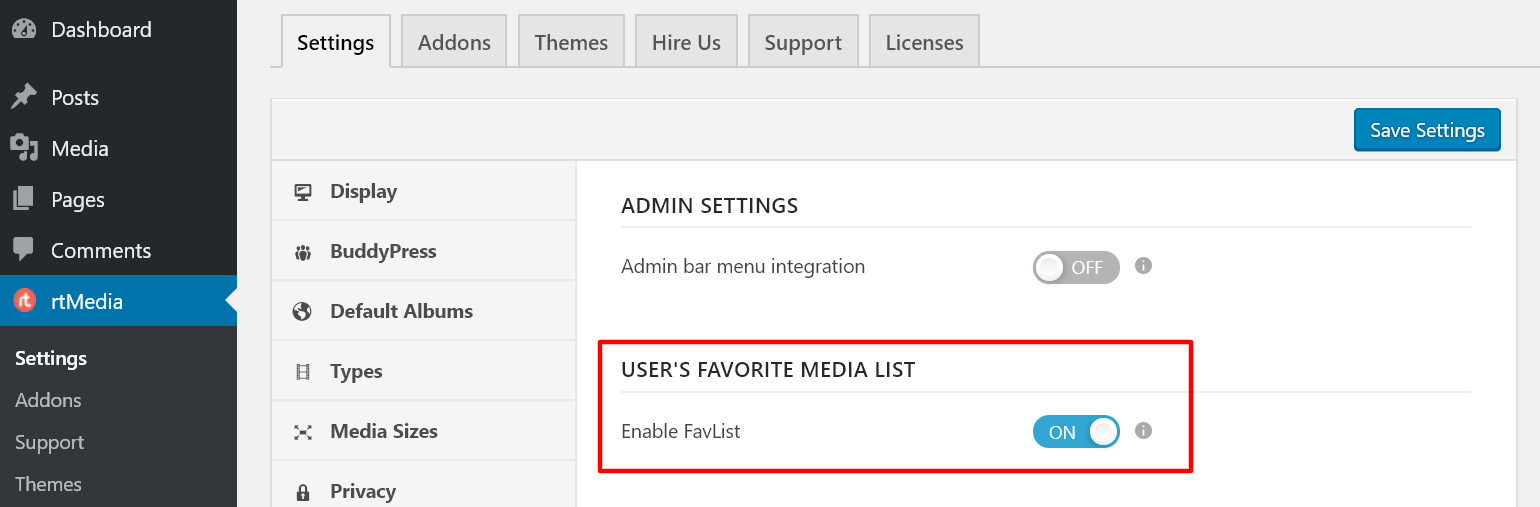
- Enable favorite media list
You can also enable users to add videos they like to their favorites list. This can be done by enabling FavList under ‘Users Favorite Media List’.
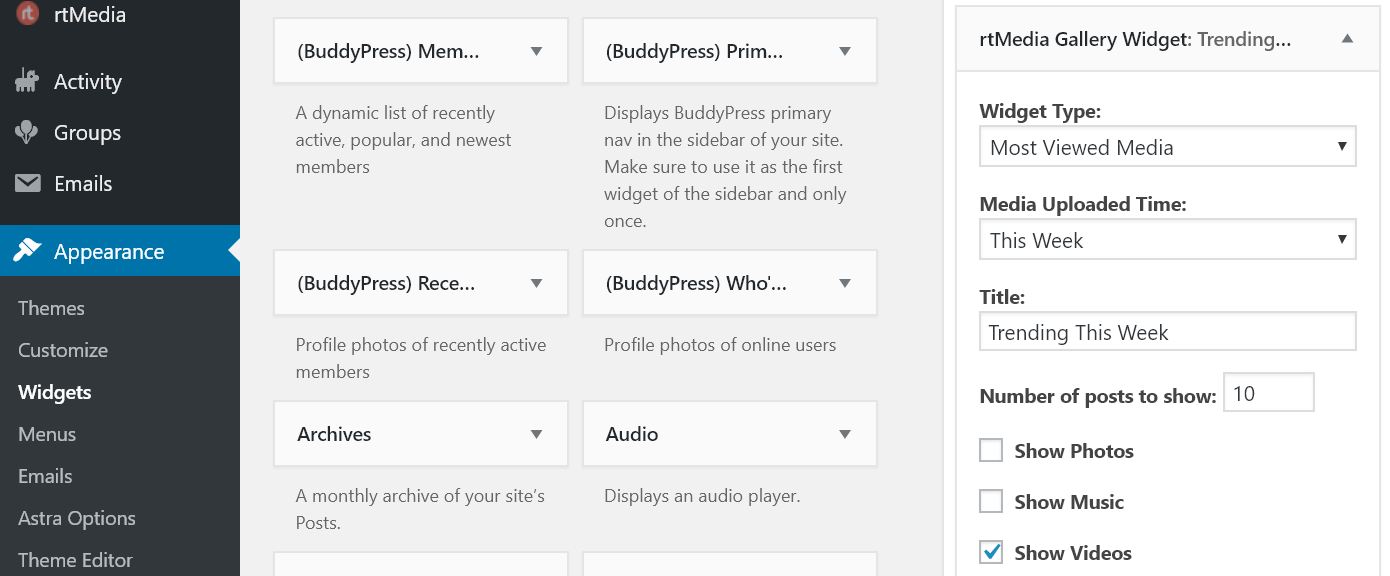
- Add rtMedia Gallery Widget to the sidebar
Finally, to display the most popular or most rated videos from your community, you can place the rtMedia Gallery Widget in your sidebar.
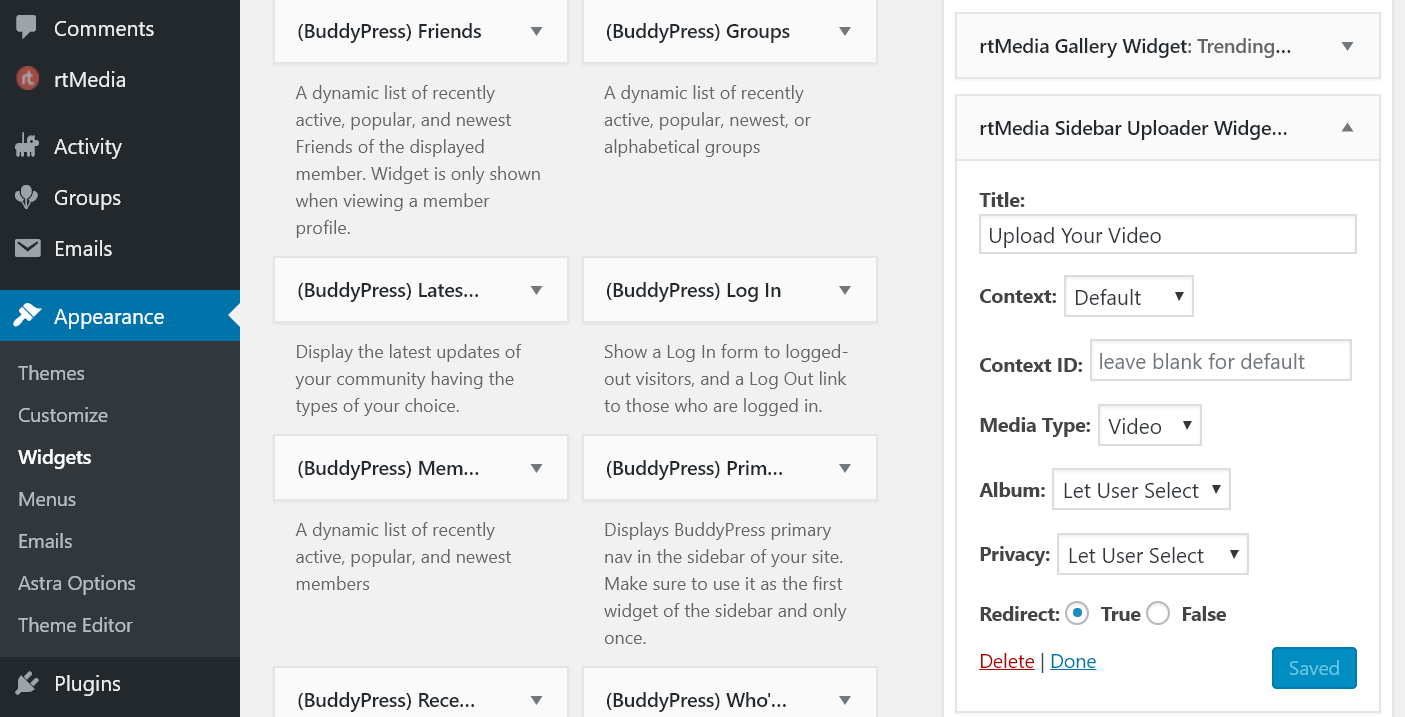
- Add rtMedia Sidebar Uploader Widget to the sidebar
And the rtMedia Sidebar Uploader Widget to allow users to upload videos from anywhere on your website, provided you display your sidebar on all pages.
- Install and configure Transcoder for WordPress
Install and configure the Transcoder for WordPress plugin from your WordPress dashboard. If you need more help, you can refer to our Transcoder documentation page.

That’s it, you have successfully added all the features required to create a website like YouTube using WordPress – social networking, video sharing, and video transcoding.
Now, all you have to do is pick a good theme for your website and you’re good to go.
Enable multiple levels of caching and use a CDN to speed up your site
Running a successful video sharing platform like YouTube or Vimeo doesn’t stop with just creating a platform and opening it to the public. You should market it, and more importantly, optimize it for performance. Media heavy websites like this can take a toll on your server. So, make sure you have enabled multiple layers of caching, optimized your database, and using a content delivery network like Cloudflare, Amazon CloudFront or Akamai to speed up video delivery on your site.
With that said, we won’t be covering the above tips in detail over here since it is out of the scope of this how-to guide. There are tons of resources available out there on the web which can help you optimize your video website. One of our favorites is WP Speed Matters.
So, what are you waiting for? Build your own Youtube now!
Links: Download rtMedia | Download BuddyPress | Buy Transcoder
Thanks for sharing these tips, I want to create a video series on make money online topic so will start a video sharing site using this method.