
Do you want to create your own social networking website like Facebook using WordPress? If your answer is yes, we can help you with that. 🙂
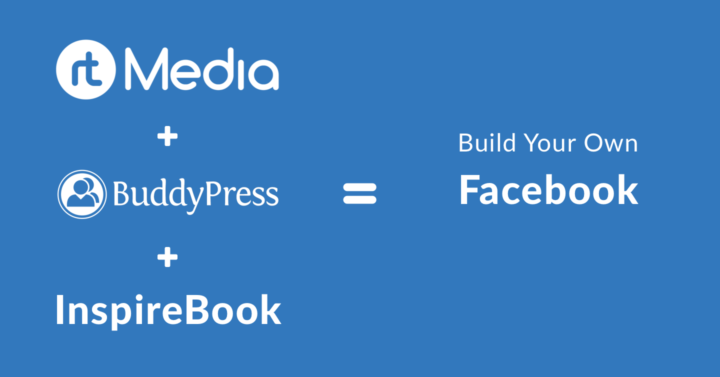
Using rtMedia – the best media management plugin for WordPress and BuddyPress – the best online community software, you can now create your own customized social networking site. In this tutorial, we will outline all the necessary steps to help you get started. So, let’s jump into it. 😃
For creating a social networking platform using WordPress, you need three things –
- BuddyPress – For enabling basic social media features.
- InspireBook – For providing users with a clean coded Facebook-like experience on your site.
- rtMedia – For managing multimedia and adding essential social networking features to your site.
NOTE: If you are planning to allow users to upload videos on your site, you can either limit them to upload only MP4 files or use our WordPress Transcoder plugin to allow them to upload video files of any format and convert them to MP4 on the fly, behind the scenes. You can also offload all the files uploaded to your website to Amazon S3 using the rtAmazon S3 WordPress plugin.
Creating a website like Facebook using WordPress 🔧
We will guide you through the steps involved in the installation and setting up your plugin in the backend and then optimize these plugins to get your own customized social networking site.
This guide is divided into three parts –
- Installing and setting up InspireBook
- Installing and setting up BuddyPress
- Installing and configuring rtMedia
Installing and setting up InspireBook
The very first step you need to do is making your social networking website look like Facebook. For that, you need to download and install the latest version of our InspireBook BuddyPress social network theme on your website. We designed InspireBook keeping Facebook’s features and design language in mind. That’s how it got its name in the first place.
Apart from that, we have made sure that it can integrate well with other essential WordPress business plugins like WooCommerce, Gravity Forms, bbPress, etc.
You can find more information on how to install and set up InspireBook from the theme documentation section.
Installing and configuring BuddyPress
By default, WordPress supports features which are only required out of the box, for it to function properly. To add the extra features that you require to run a social networking site, you need BuddyPress. BuddyPress is a free WordPress social networking plugin which enables social media features like custom profile fields, groups, and activity streams (similar to Facebook news feed).
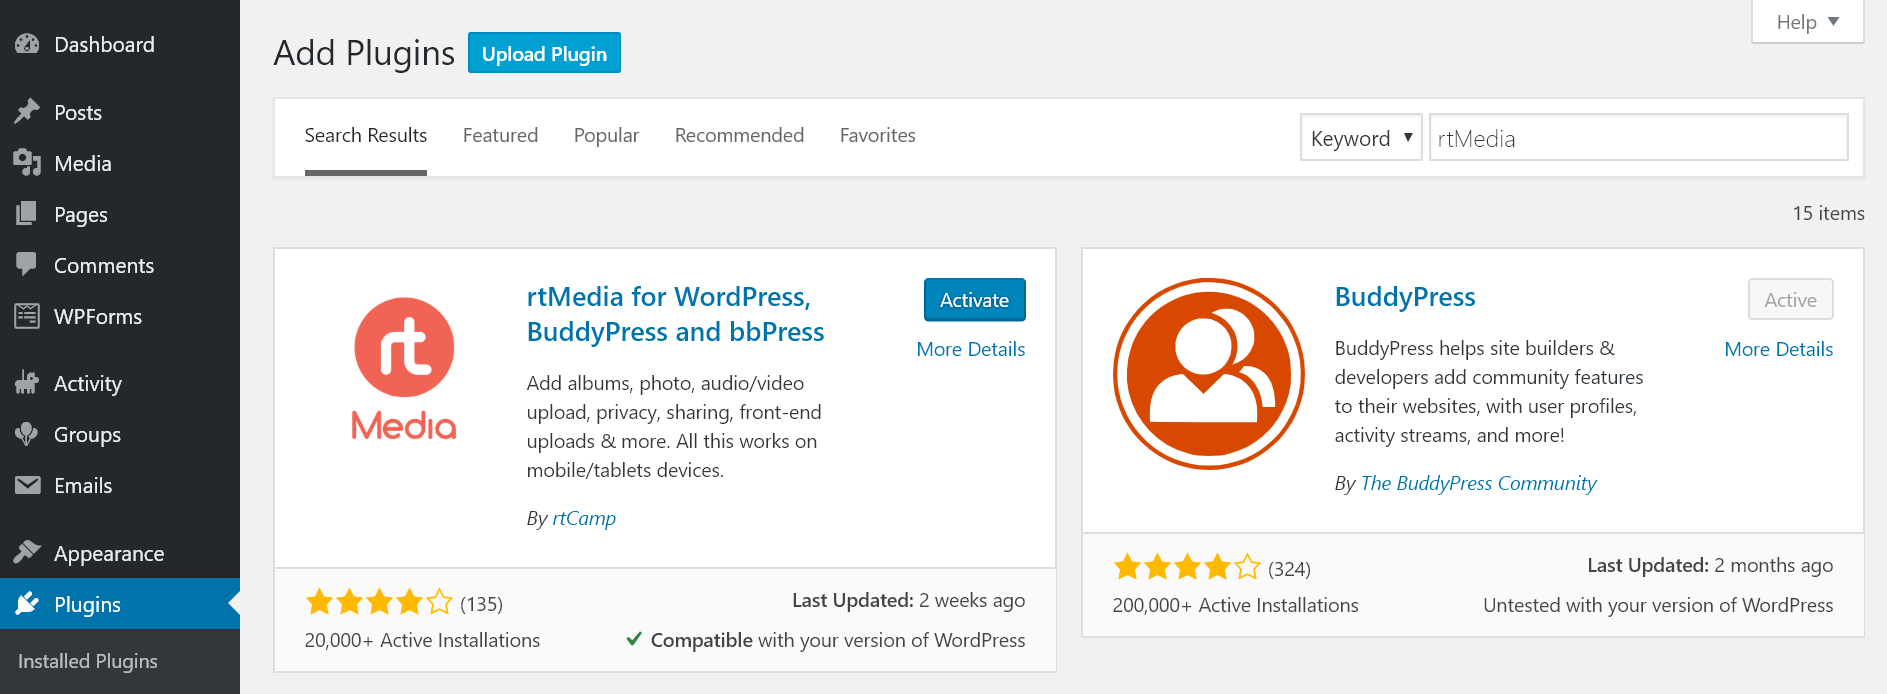
Step 1 – Install and activate the BuddyPress plugin.

Step 2 – Go to the BuddyPress settings page and enable support for Friend Connections, Private Messaging, and User Groups under the Components section.
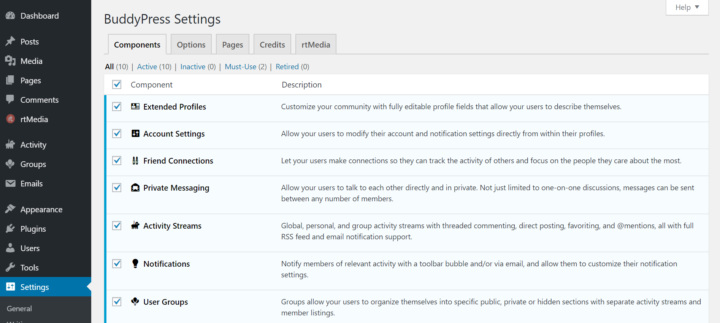
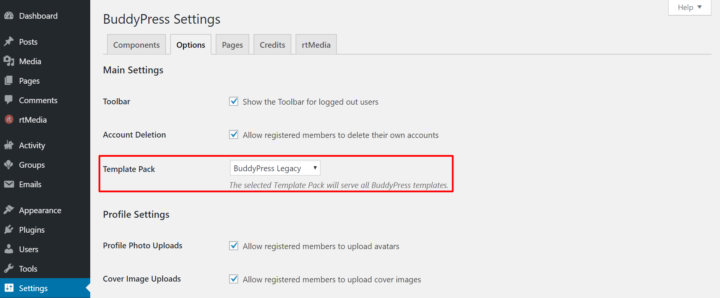
Step 3 – Click on the Options section to access a list of other BuddyPress features. From here, you can enable or disable some extra features depending on your needs.
NOTE: Since InspireBook doesn’t work with the BuddyPress Nouveau template pack, you will have to select BuddyPress Legacy as your template pack.
That’s all. You have now configured BuddyPress to form the base platform of your social networking website. Now, it is time to install and set up rtMedia.
Installing and configuring rtMedia
We have now come to the main part of this How-to guide. You might be wondering why you need rtMedia when you already have a Facebook-like WordPress theme and BuddyPress.
Well, you need rtMedia to add multimedia capabilities and other important features found in social networking platforms, to your site. Since BuddyPress doesn’t offer media support out of the box, without rtMedia, your site will look plain and dull. rtMedia enables support for images, videos, and even music on your social networking platform. Moreover, rtMedia is the best media management social networking plugin for WordPress.
NOTE: The free version of rtMedia – rtMedia Core offers only the basic multimedia features and functions required for creating your website. Make sure you read about rtMedia Core features and play around with its settings to discover all its free features. rtMedia Core has a lot of features required for a social networking site but you will need the following add-ons to enhance your site and make it more like Facebook.
- rtMedia Likes
- rtMedia BuddyPress Profile Picture
- rtMedia Photo Tagging
- rtMedia Social Sync
- rtMedia Moderation
- rtMedia Restrictions
- rtMedia Custom Attributes
- rtMedia Album Privacy
- rtMedia WordPress Comment Attachments
- rtMedia Default Albums
- rtMedia Photo Filters
- rtMedia BuddyPress Group Media Control (optional)
- rtMedia Membership (optional)
If you purchase each of these add-ons separately, it would cost you around $987. Instead, you can get our rtMedia Pro Bundle for just $499. The rtMedia Pro Bundle consists of the above add-ons and the rest of our premium rtMedia add-ons (35 add-ons in total). You can use them on your existing site to unlock more rtMedia features or use them on a different WordPress site for other purposes.
Time needed: 10 minutes
Let’s see how to install and configure rtMedia on your site.
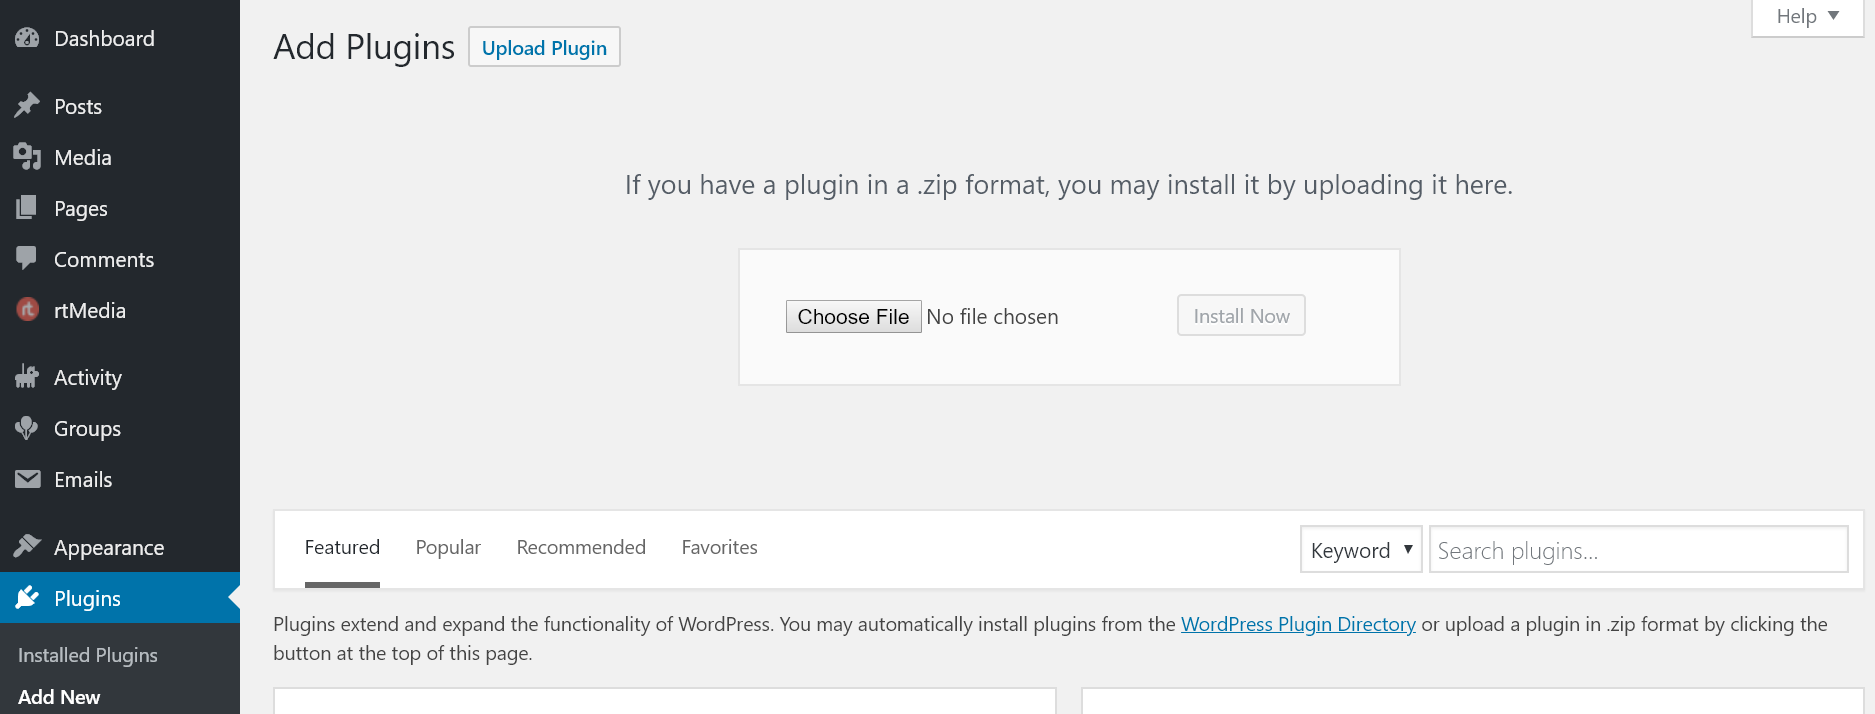
- rtMedia installation
Install and activate the rtMedia plugin.
- Add-ons installation
Install and activate the above-mentioned add-ons on your site. You can install them like any other WordPress plugin from your WordPress dashboard. Just download them from your rtMedia account and upload them manually.
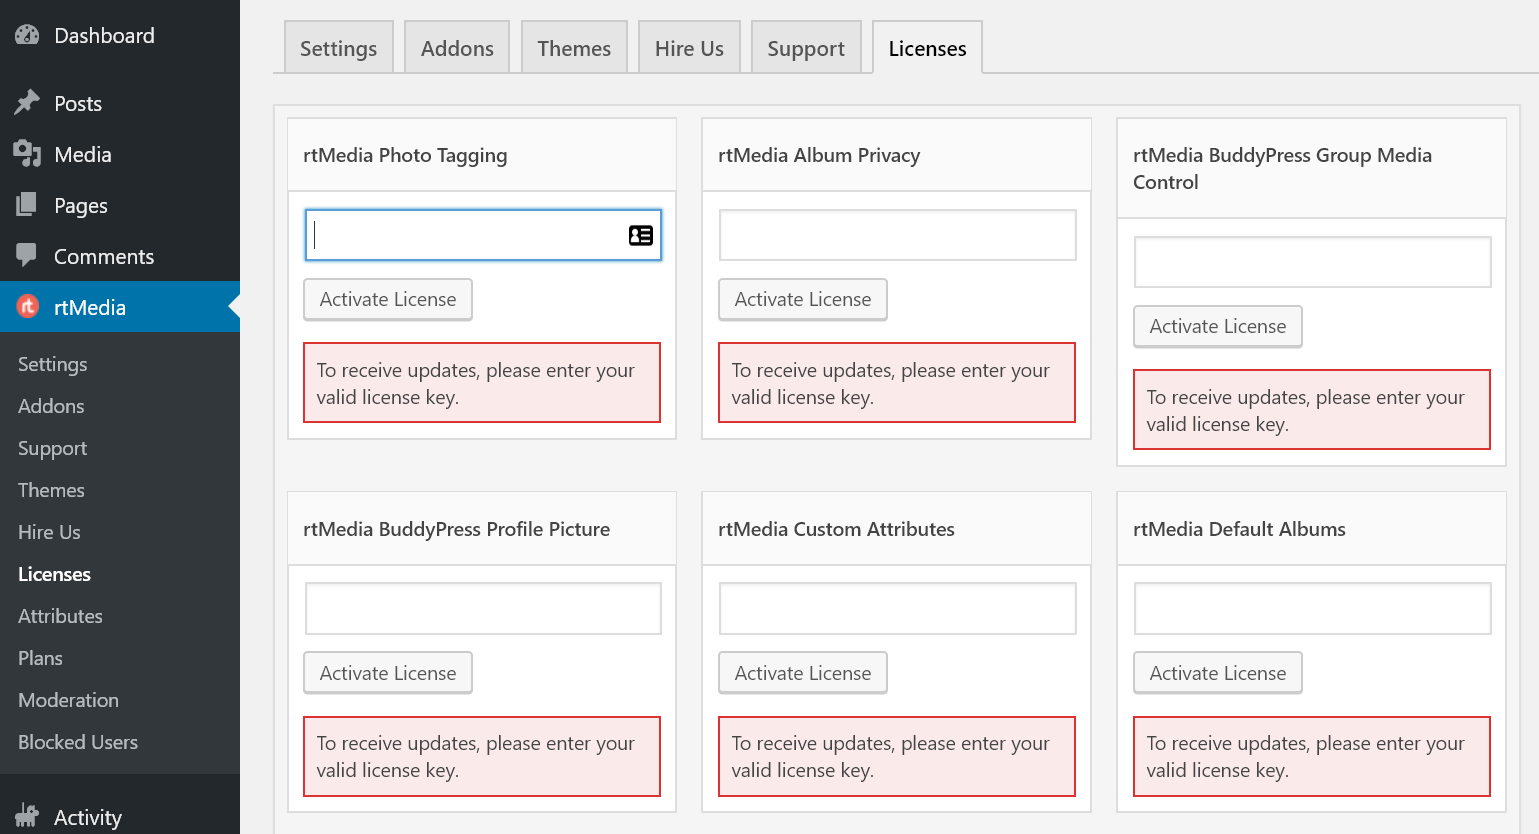
- Add-ons activation
Once you have uploaded all add-ons, open the rtMedia settings page, navigate to the ‘Licenses’ section, and enter your license keys. If you skip this step, you won’t be able to get security patches and feature updates directly from rtMedia.
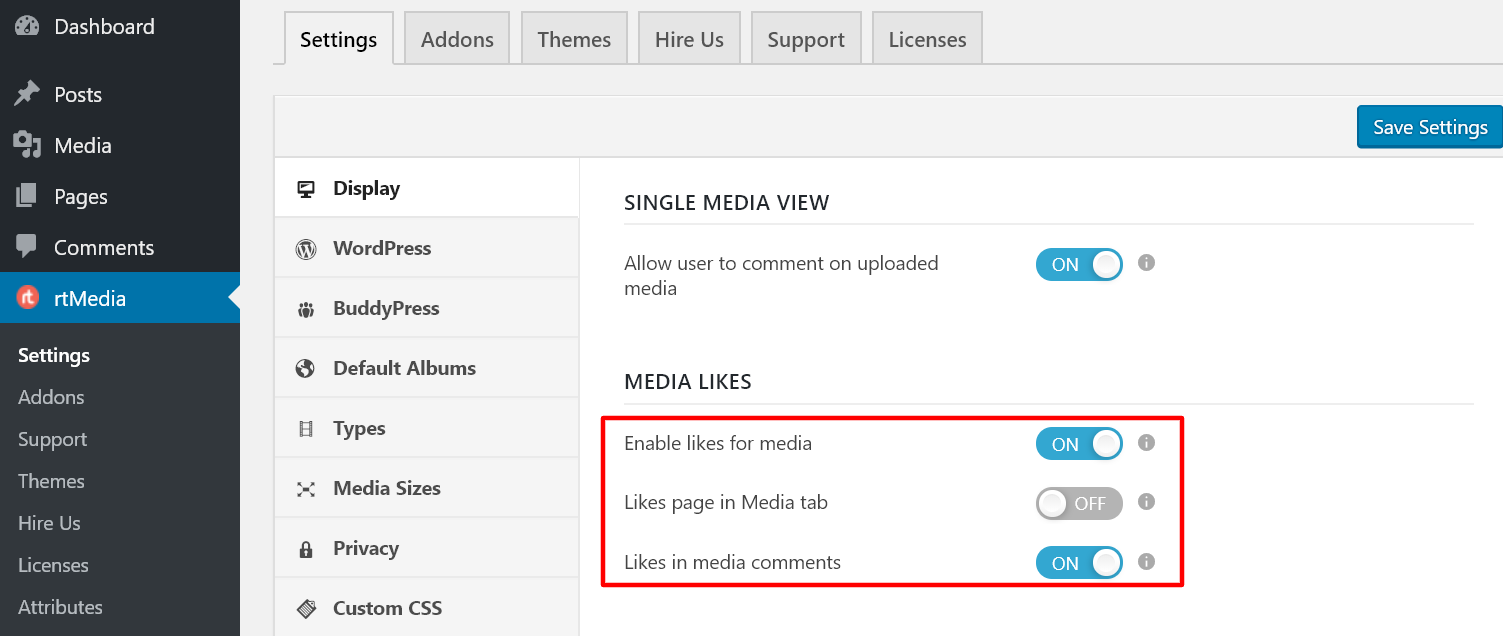
- Display settings
Now, go to the Display section and turn on the toggles for ‘Enable likes for media’ and ‘Likes in media comments’ under the Media Likes heading.
- WordPress settings
Move on to the WordPress section and enable support for attachments in comments.

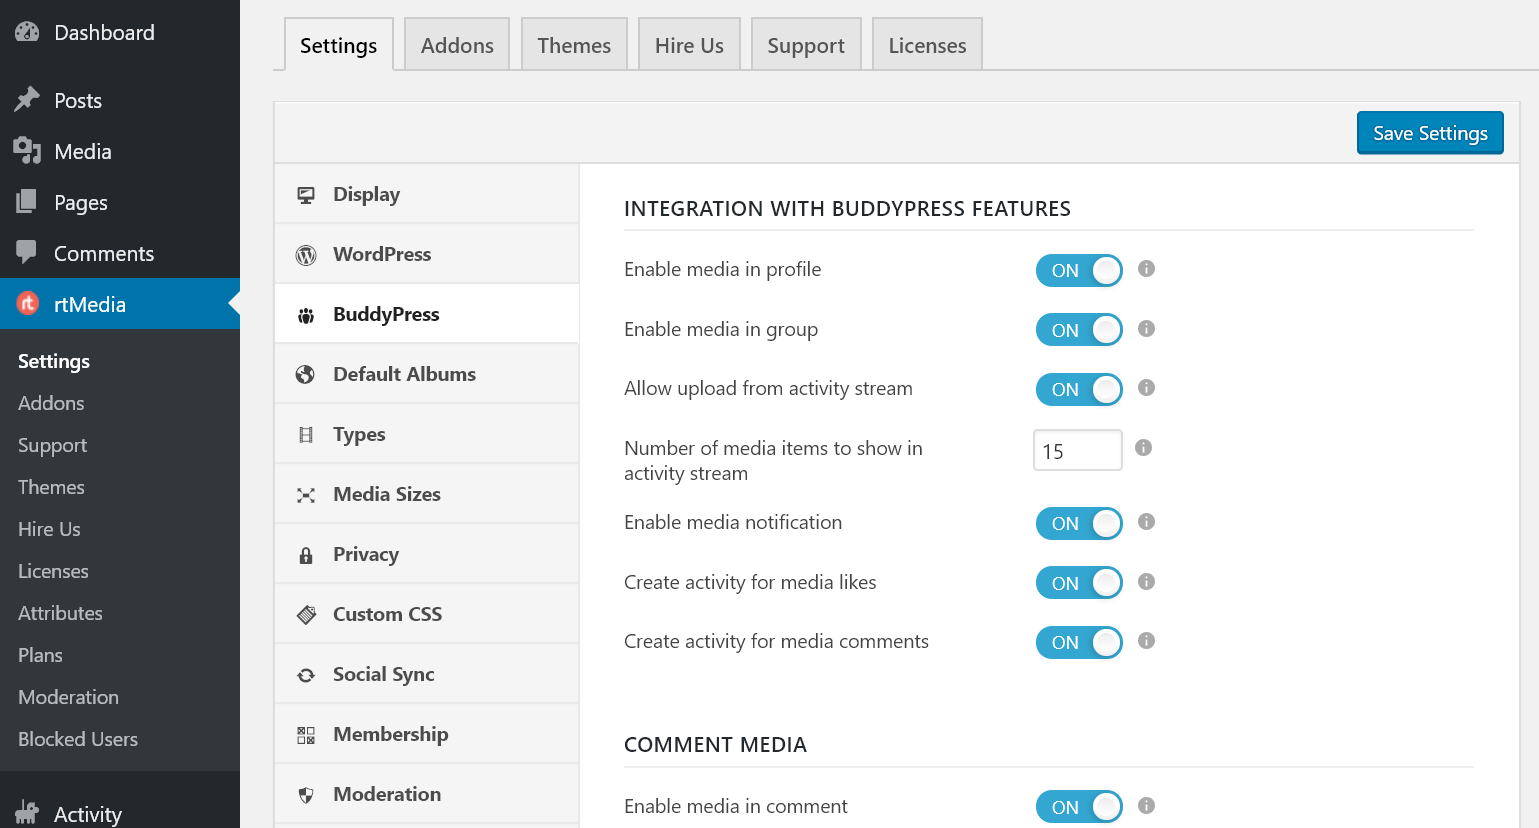
- BuddyPress settings
Go to the BuddyPress section and turn on the toggle for all features under present under all headings (integration with BuddyPress features, comment media, and album settings).
- Default Album settings
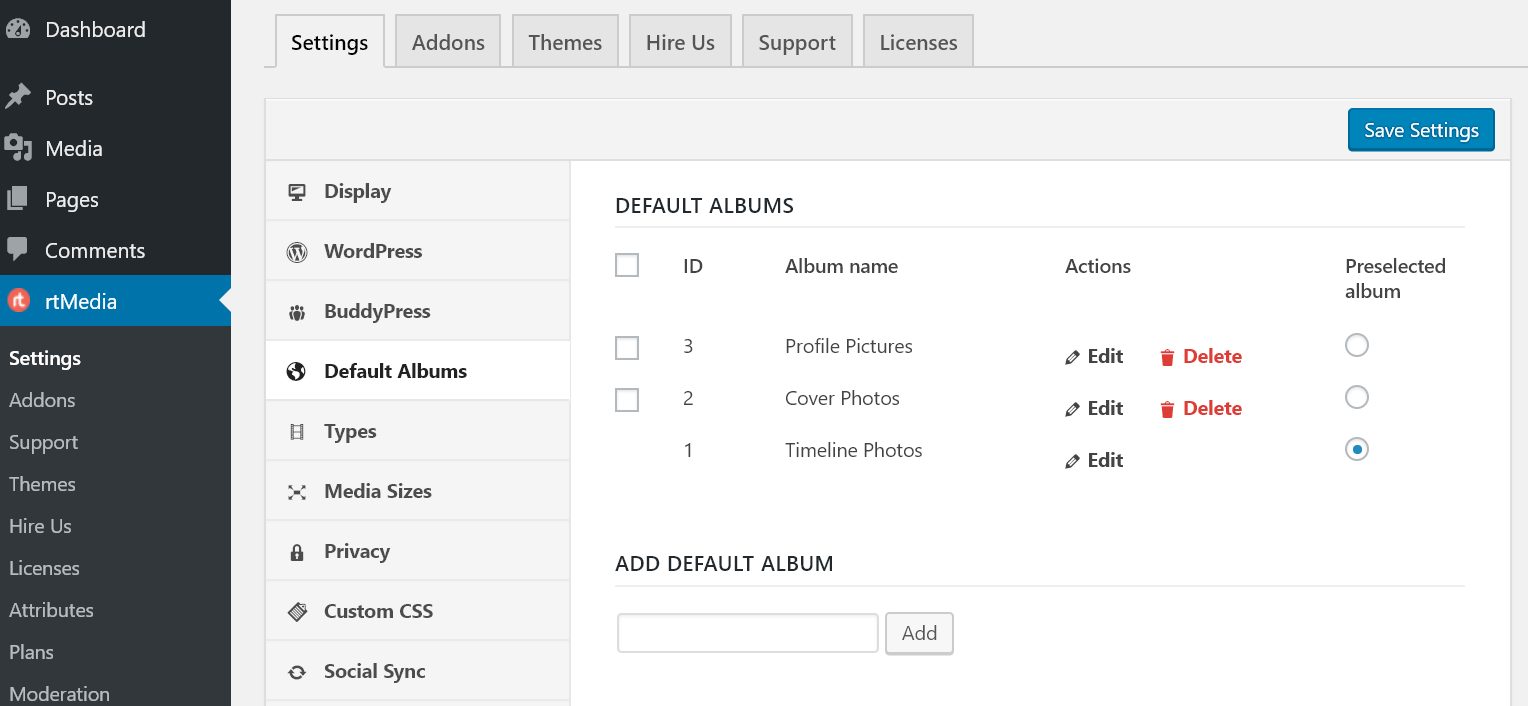
Now, open the Default Albums section to create and select default albums that should be present on all member profiles.
- Types settings
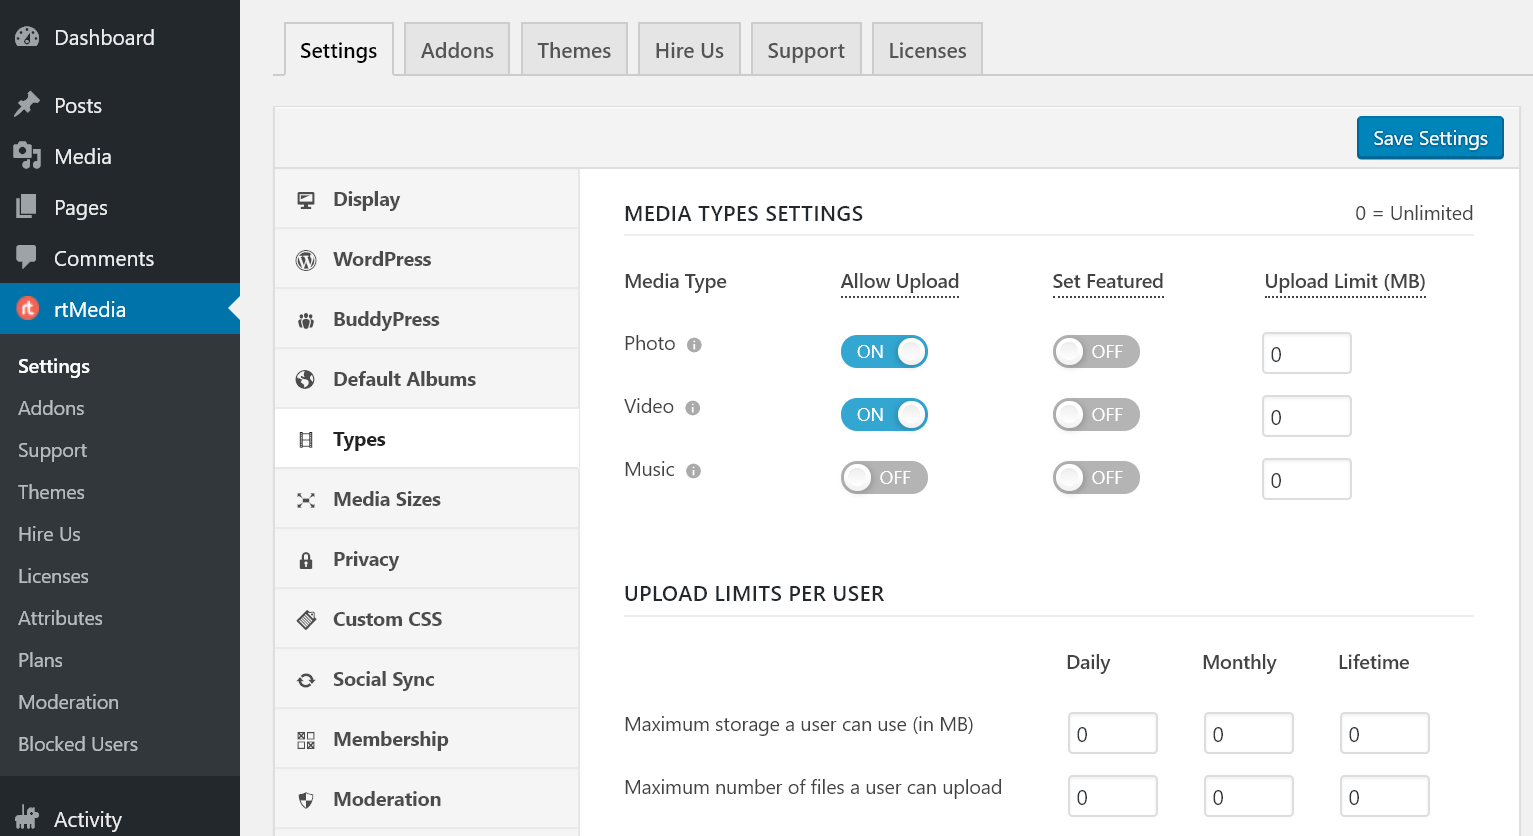
Go to the Types section to alter which type of media you want to allow users to upload on your site. From here, you can also limit the number of files and storage used by them on your site.
- Media Sizes settings
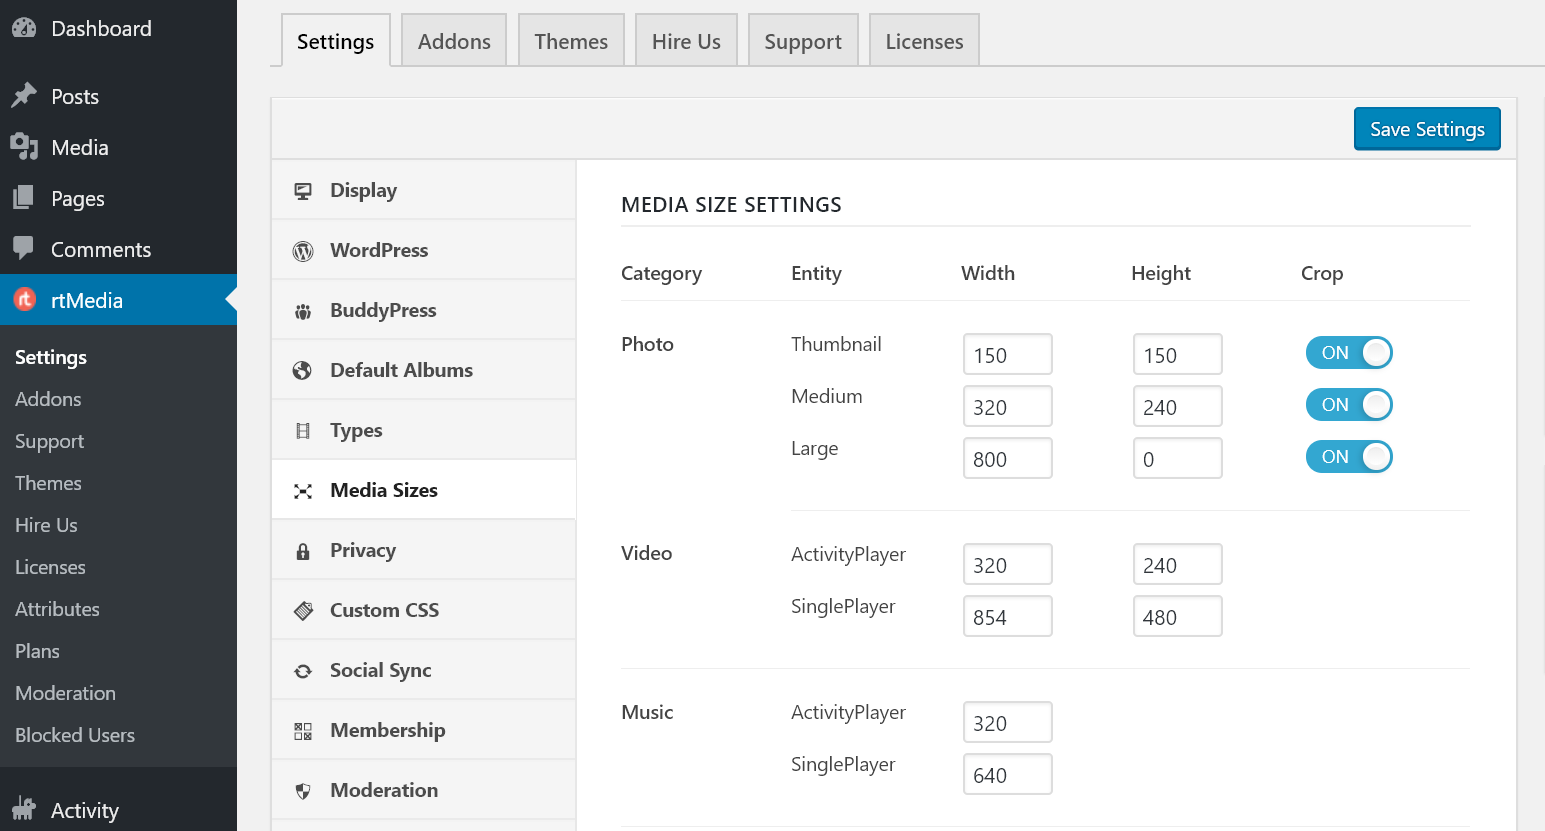
From the Media Sizes section, you can change the dimensions for the media displayed on your site. Also, you can decide whether or not to crop them while displaying.
- Privacy settings
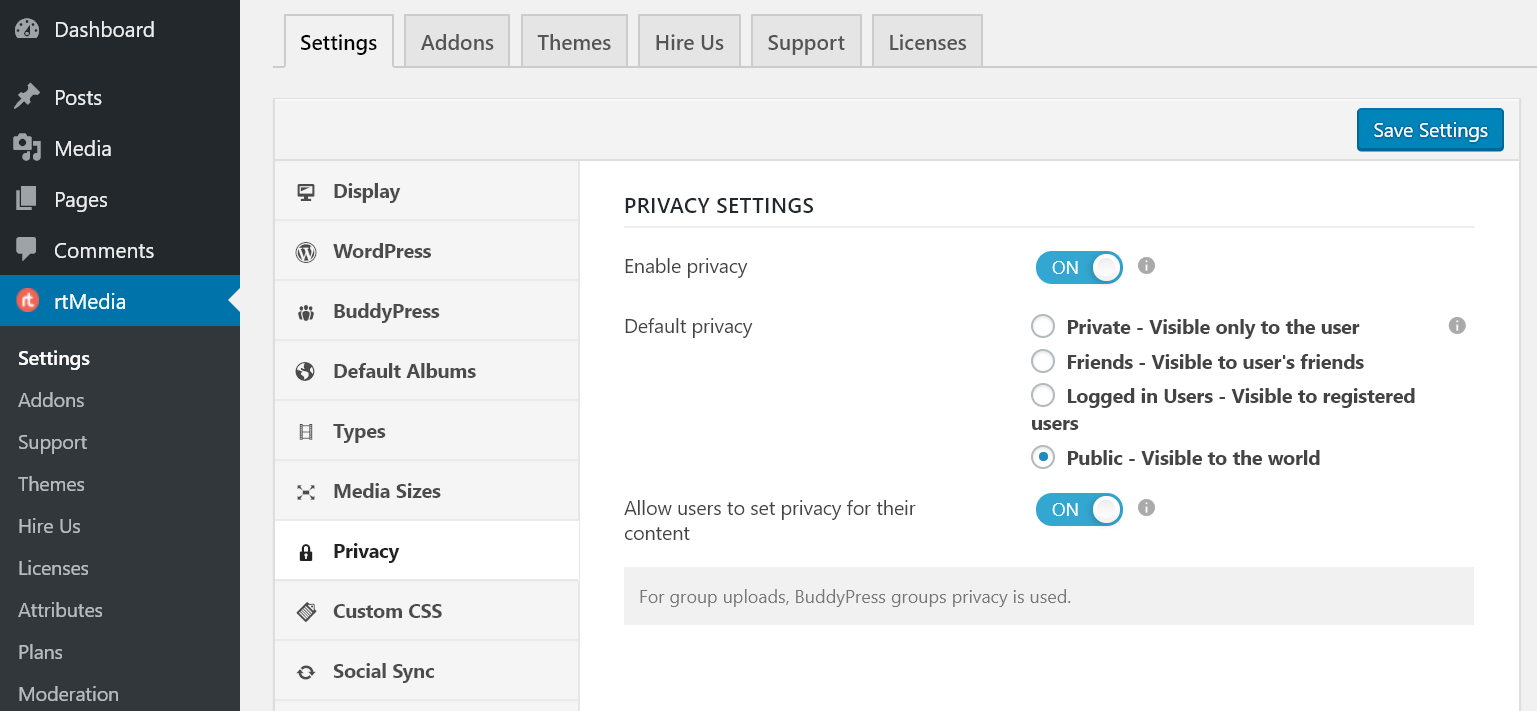
To allow users to choose their own privacy settings for their posts, enable privacy settings under the Privacy section. Once you have enabled it, you can set the default privacy and allow users to pick their own privacy settings.
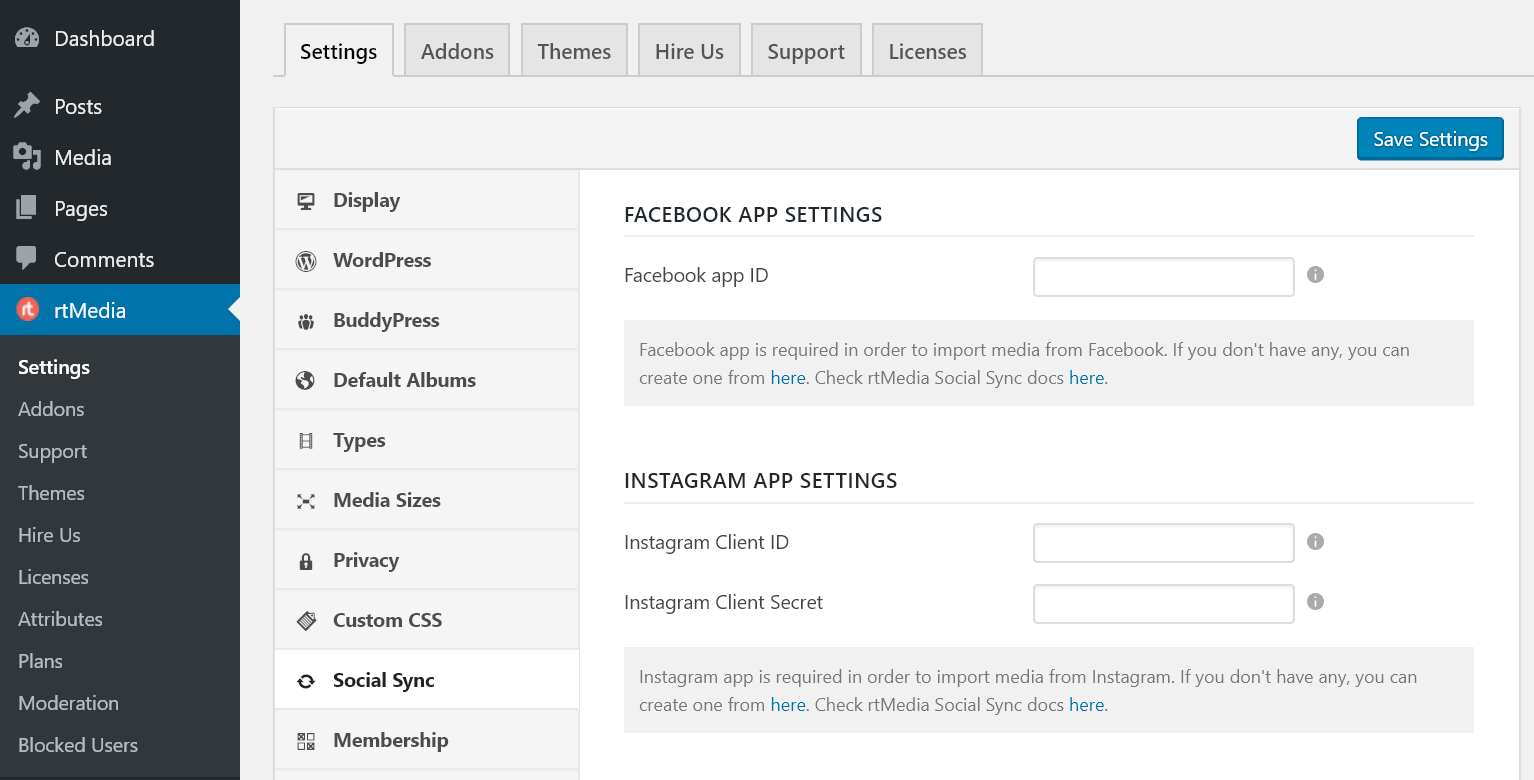
- Social Sync settings
To allow users to import their photos and videos from Facebook and Instagram, you need to configure the Facebook and Instagram App settings from under the Social Sync section. Details instructions on how to do that can be found from the linked rtMedia Social Sync support document.
- Membership settings
If you are thinking about creating a premium social networking platform where the user needs to pay to unlock features and use your site, you can do that by moving down to the Membership section.

- Moderation settings
To enable moderation, go to the Moderation section and turn on the toggle. Once you have enabled it, you can configure rtMedia to take down content automatically after it reaches a specified number of reports.

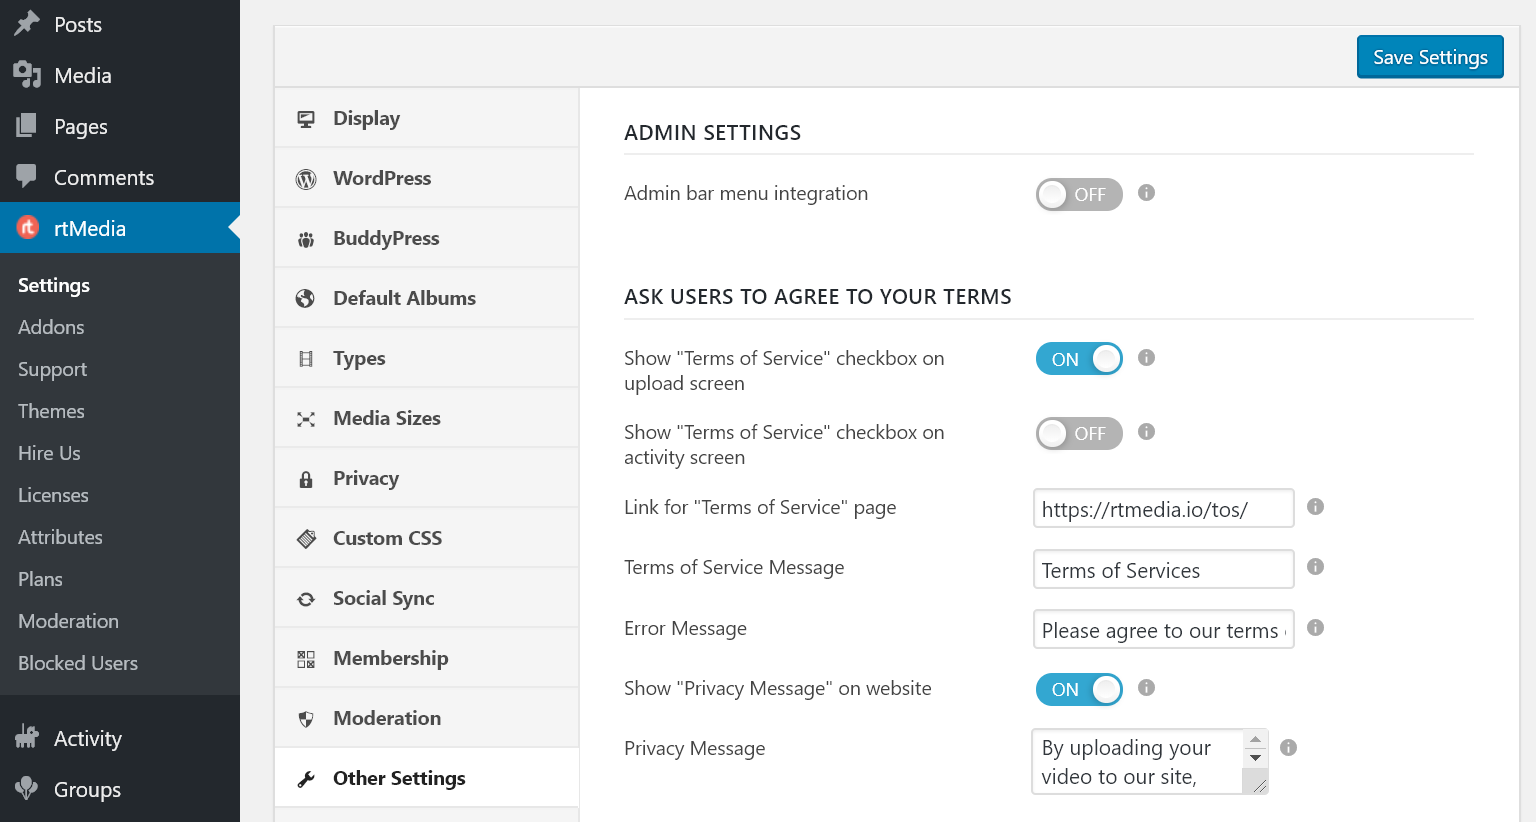
- Other settings
Lastly, go to the Other Settings section and configure rtMedia to display your social networking site’s Terms of Service and Privacy Policy page to end-users.
You have now successfully created your own social networking website like Facebook using WordPress. 🎉
Up your social media game with rtMedia 😎
rtMedia is an all-in-one solution for setting up your social networking site with WordPress and it integrates well with all popular and WordPress default themes and plugins.
We are constantly working hard to improve our product and it would be great if you could let us know what social networking feature you would like to see included in the next release of rtMedia. Do let us know in the comments section below!
So, what are you waiting for? Create your own social networking site now! 🙂
Links: Download rtMedia | Download BuddyPress | Buy InspireBook
You must be logged in to post a comment.