
Admin Settings:
You will need a live Instagram app. Please create one if you do not have it already. Create your Instagram App and submit it to make it live.
Once you have a live Instagram app, you will get your Client ID and Client Secret.
Go to WordPress Dashboard > rtMedia > Settings > Social Sync and add your app details in appropriate text box. Please check following screenshot for more information.

Import Option:
The Instagram icon is available in user’s media page under Social Media Import tab in uploader. If the user is allowed to upload media, he/she can see the import option as shown in the following screenshot.
![]()
On clicking Instagram Icon, user needs to enter Instagram login credentials if not logged in, and then authorise the application.
If the application is already authorised, it will open lightbox with loading message.
When the application successfully loads media from Instagram, it will show images and videos of user, as shown in the following screenshot.
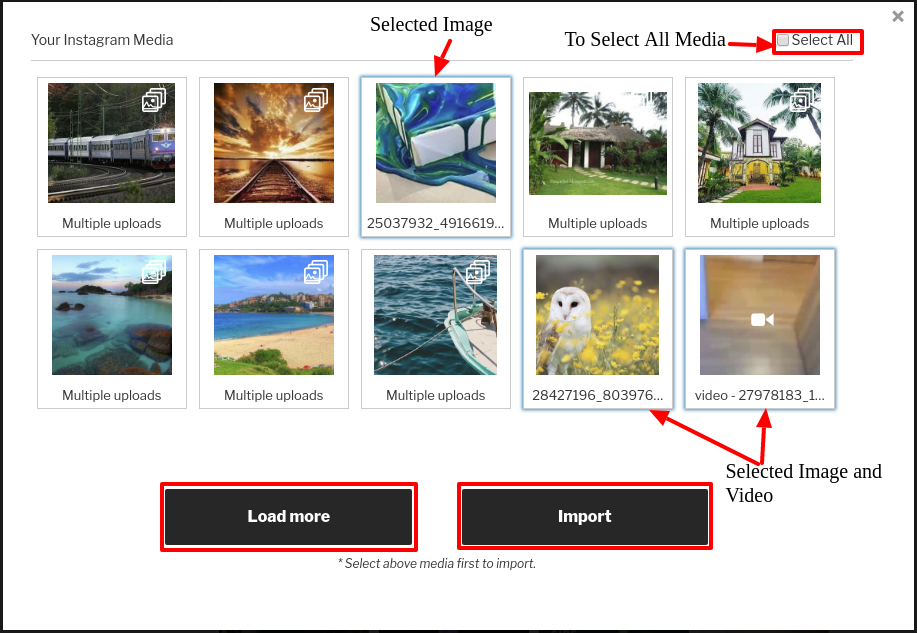
From this window, users can import their Instagram media into rtMedia. In the top right corner there is an option to select or deselect all media. All the selected media will be highlighted to differentiate them with others. By default it will load 10 media, if there are more, it will show Load more button.
![]()
Users can set Privacy of media (if allowed from rtMedia admin settings) and can select album before start importing selected media. You can also remove media from upload queue by clicking on ‘x’. Click on START UPLOAD button to start importing selected media from Facebook.
You can import more media by clicking on *Instagram icon again.
Create Instagram App
What you will need
- Client ID
- Client Secret
How to get Client ID and Client Secret
You need to have an app which you can create from
How to get Client ID and Client Secret
Details Tab
- Add your site url including slash (/) as a Valid redirect URIs. i.e https://yoursite.com/

- Fill other details as per your requirements.
Security Tab
- Uncheck the checkboxes for these two
- Disable implicit OAuth
- Enforce signed requests
- And Register your app
Note: This app will be in Sandbox Mode. For live mode you need to apply for a Permission Review as shown below.
Permission for Live Mode
Please check full documentation of Review.
Every new app created on the Instagram platform starts in Sandbox mode. Apps in this mode can use any API endpoint but are restricted to a limited number of users and media.
To go Live and fully access Instagram content, you will need to submit your application for review and approval.
Steps:
- Go to Manage Clients and edit the app you want to submit for review.
- In the Details tab make sure to fill out all fields and save any change with the Update Client button.
- Go to the Permissions tab which shows each permission and their review status.
- Click the Start a submission button and then follow the instructions.
- After that you need to select option as shown as below:

- After then fill some information as shown as below:

- And Submit.
Note: It will take some time to review your App. You need to check after 1 or 2 days (May be longer. It depends on the Instagram reviewer.)
Troubleshooting
Issue you might get
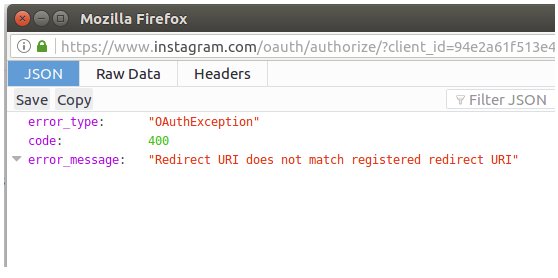
Solution:
Your app should be configured with live website URL.
- Go to Instagram.
- Click on Manage button of your current app.
- Now go to Security tab.
- Add your site url as shown below in screenshot.
Note: Add your site url with trailing slash. ( i.e http://yoursite.com/ ) Otherwise you might get the same error again.
You must be logged in to post a comment.